 In this blog I’m going to discuss the pros and cons of different woods that I’ve burned on and how to prep the wood for optimal wood burning.
WOOD THICKNESS – I recommend using wood that is at least 3/8 inch (0.95 cm) or thicker; unless burning on plywood*. Wood that is 1/4 inch (0.64 cm) or thinner has a tendency to curl and bow as the wood ages. The smaller the piece of wood, the more noticeable this will be with the exception of plywood.
* Due to how plywood is make it can remain very thin and seldom curl or bow, but it is also a lot more susceptible to water damage.
Foreword – because each person is different, a wood variety that isn’t bothersome to me might be to you. Plus there many woods not fit for burning on because they are too dark, or an irritant, or even toxic (like yew and milky mangrove). There are many places online to check and see if a wood is a known toxin. Keep in mind that the toxicity chart is more about wood dust, but it’s best to stay on the safe side.
Here’s a link to a wood toxicity chart I’ve used: https://www.mountainwoodworker.com/articles/toxic_woods.pdf
Also, almost all wood species have several varieties or subspecies and some varieties might be worse than others. Take cedar for example, all species are listed as an irritant if burned, but western red cedar can cause asthma in some individuals.
 DO NOT BURN ON PLASTIC OR SYNTHETIC MATERIALS. DO NOT BURN ON FINISHED OR RECLAIMED WOOD.
Wood burning releases fumes from the heat of the pen coming in contact with the item you are burning on. Depending on the substance, the fumes that are generated can be very toxic!
Never burn on exposed to the weather, like old fence boards, as they could be harboring molds and bacteria. Stains, sealants and other items used to finish wood should be treated like plastic and synthetic materials – they were NEVER meant to be vaporized and the fumes can be very toxic. Your health isn’t worth the risk associated with burning on such items.
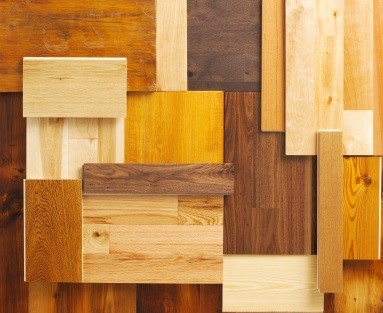
Below are pros/cons for the assorted woods I’ve burned on. I’ve provided pictures where I can, but keep in mind each type of wood can vary a lot in color and grain pattern depending on where it was grown, the growing conditions, how it was cut, etc. so there will be variances.
JANKA RATING
I list the Janka rating for the different woods I’ve burned on. The Janka rating is a test that is performed on wood to determine how hard it is. The reason I find this information helpful is that it gives me an idea of how high of a heat I need to use to burn on it. Let me explain.
The higher the Janka rating is, the harder the wood is. Harder woods require a higher heat to burn on than softer woods. I like to burn on Basswood. It has a Janka rating of 410, and I know where to turn the dial on my burner for it. Maple has a Janka rating of 1450, so I know it will require a higher heat setting than basswood does.
Another thing I’ve noticed, is that it is easier to create really crisp fine detail on harder woods.
WOODS I’VE BURNED ON
ALDER
 Is technically a hardwood, but with a Janka rating of 590 its on the softer side. It felt nice to burn on, but it is a bit darker wood; especially compared to basswood. Keep in mind that this might have been a characteristic of the board I was burning on versus the species in general. I personally wouldn’t use it for projects.
Pros – –
- No resin/sap (that I’ve encountered)
- Nice to burn on and was easier than poplar even though it’s harder than poplar
- Cheaper than poplar
- Can find in home improvement stores
Cons – –
- Limited widths – I only found 4” wide (10.16 cm)
- Fairly dark in color especially compared to basswood and maple
- Very grainy
 This is the artwork I did on alder. It isn’t overly fancy or complicated since I was just testing out the board. I didn’t want to spend a lot of time on it.
AMERICAN HOLLY
 American holly has a Janka rating of 1020, so it’s a hardwood. It is supposed to be the lightest colored wood available. Holly is a type of wood I had wanted to try for a long time, but I was a bit disappointed with it.
 The board I bought was extremely light in color, but it had a texture to it like curly maple. This created a texture on the background that I wasn’t too fond of. This photo shows a close up of the texture that appeared on the background of my project.
 This is the most expensive wood I’ve burned on. I bought a book-matched panels. These two board measured 5 1/4″ wide x 12″ long x 1/8″ thick (13.3 x 30.5 x 0.32 cm). The boards cost me $33 dollars.
To have something I could burn on, Todd glued the two boards together and the mounted them on a wooden frame to make a cradled board. The red arrow is pointing to the seam line between the thin holly boards and the maple frame Todd attached them to.
Pros – –
- Very light in color
- Minimal grain
- No resin/sap (that I’ve encountered)
Cons – –
- Not easy to find
- Extremely expensive
- The board I burned on had a curly maple texture that I didn’t like
- Not easy to find boards of any significant width
 Here’s the artwork that I burned on to American holly. I think it turned out nicely, but I wouldn’t burn on American holly again because of how expensive it is.
 I do have a video that shows you how easy it is to make a cradled board. Cradled boards are a great option to prevent thin boards from warping. To watch you can click on the video thumbnail, or click on this link: https://youtu.be/8URkMte3ML4
BALSA WOOD
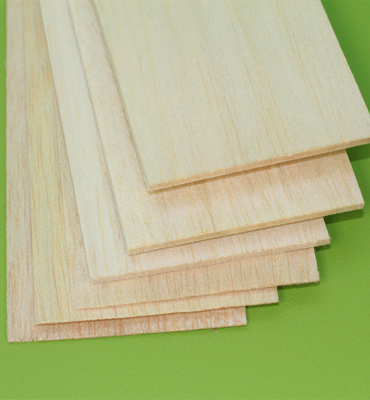 Balsa has a Janka rating of 100, so it is a very soft wood. I wouldn’t recommend burning on it. I know they use it for making model planes as it is a lightweight wood. I’ve only found it sold as blocks for carving or really thin strips for things like model airplane making.
Pros – –
- Very light in color
- Minimal grain
- No resin/sap (that I’ve encountered)
- Extremely soft wood, so very easy to create divots, embossed lines, grooves
- Very Inexpensive
- Can be found in stored that have supplies for creating models (planes, buildings, etc) and some wood stores.
- Exotic Wood store and wood carving supply store will carry blocks of balsa wood for carvers (would need to saw it into planks)
- I use this to practice / test ideas on as it’s inexpensive
Cons – –
- Not as readily found
- Very limited sizes of prepped boards – usually 2-5” wide strips (5.1 – 12.7 cm)
- Prepped boards are usually very thin in thickness
- Tends to curl since it’s not very thick
- Super easy to gouge when fixing mistakes
- Would only use as practice pieces
- When burning dark the tip tends to sink into the wood
![]() I burned my hand logo on a piece of balsa.
I burned my hand logo on a piece of balsa.
BASSWOOD (my favorite)
 Basswood has a Janka rating of 410. While it’s considered a hardwood, it is on the softer side.
Basswood is very nice wood for decorative art. It’s fairly inexpensive. It is my favorite to burn on. In fact, the majority of my artwork is burned on basswood.
I just read an article (Feb 2018) that stated Basswood is called European Lime or Common Linden in Europe. Note that the wood is not related to the lime fruit tree.
Pros – –
- Very light to light in color, sometimes with a tint of yellow
- Don’t need a high heat setting to get dark burn results
- Minimal grain
- No resin/sap (that I’ve encountered)
- Softer wood, so fairly easy to create divots, embossed lines, grooves
- Inexpensive
- Can be found in craft store and wood stores
Cons – –
- Softer wood, so not a great choice for non-decorative items that get a lot of handling
- Can be easy to gouge when fixing mistakes
 This artwork of a misty marina. There is a lot of fine details in the artwork.
BEECH
 Beech has a Janka rating of 1300. I tried this wood and didn’t care for it. I like how pale the wood is, but has lots of little dark dashes in the grain that ooze sap when heated. Also the grain darkens up a lot when burned over making it look like it has a layer of dots over it.
Pros – –
- Light in color
- Hardwood that’s not quite as expensive as maple.
Cons – –
- Harder to burn on that than maple. I had to turn the heat up a lot higher than normal on my unit
- Has little dark dashes that oozed resin or sap when I burned over them.
- Not readily found. I’ve only found it in a specialty wood store.
I don’t have an art project to show for beech. I only burned on a little piece of it to see what I thought.
BIRCH – plywood
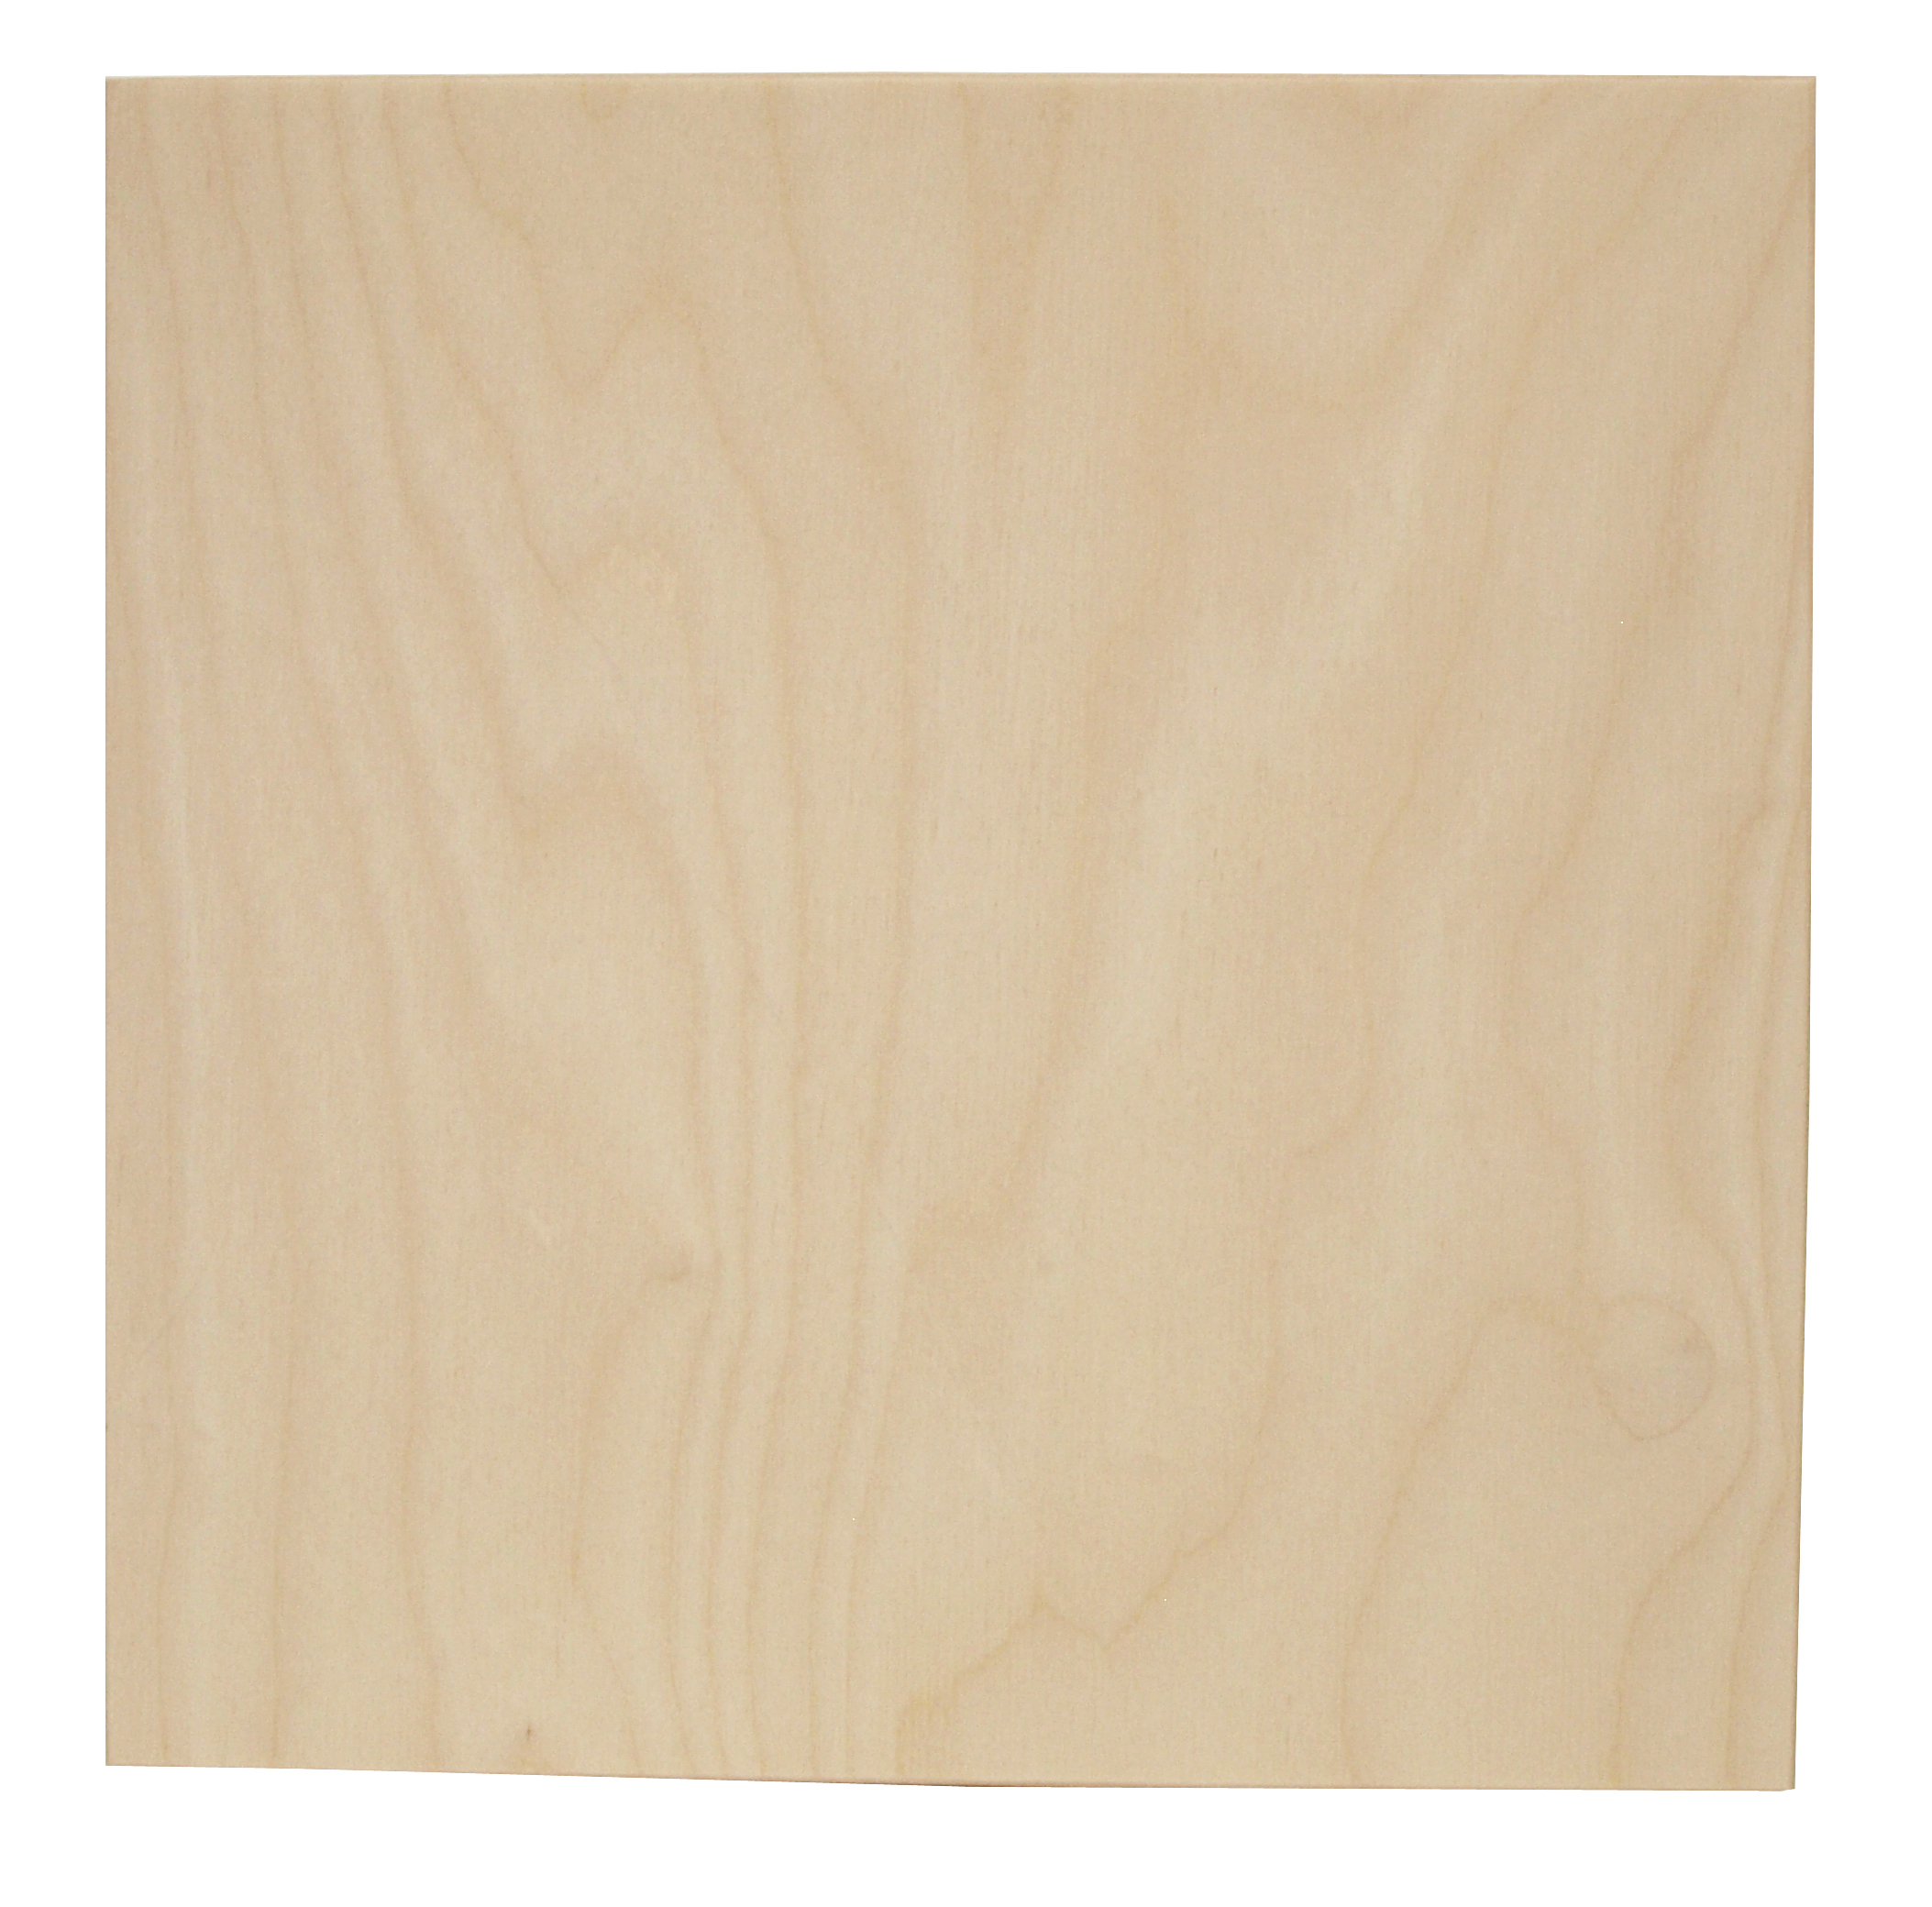 The Janka rating for Birch is 1260. So far, I’ve only burned on birch in it’s plywood form. I did find a specialty wood store that sells solid wood bords of birch, one day I will make a trip and buy one.
There are 2 types of birch plywood that I know of, Baltic and Russian, and I burned on both. Russian birch plywood has a smoother surface, but also tends to have more grain lines. Also the Russian plywood is a bit darker than the Baltic, and it costs more; at least it did at the store I bought it from. Lastly, I can’t readily find Russian birch plywood in my area. I have to go to a specialty wood store.
I do have more information about plywood, and that can be found in the plywood section.
Pros – –
- Tends to be very light in color
- Usually pretty easy to find
- Minimal grain
- No resin/sap (that I’ve encountered)
- Inexpensive
- Can purchase large sheets of plywood, so can create larger works of art without gluing up boards
- Can fix mistakes fairly easily
Cons – –
- Tends to splinter – small slivers of wood flake off
- Usually sold as plywood
- Craft stores tend carry in the form of decorative items like bird houses, boxes, etc
- Wood stores are only place to find sheets
- Hardwood, so not as easy to create divots, embossed lines, grooves
- Tends to be pitted or slivered even with lots of sanding, so not the smoothest texture I would prefer. I use it for the tutorial pieces.
- The artwork does NOT age well. Plywood fades a LOT more than any other type of wood I’ve burned on.
- Avoid using an eraser on it as little tidbits of the eraser gets ground down into the surface.
 The Carnival Mask was burned on Baltic birch plywood
 Vista House burned on Russian birch plywood (with a black walnut frame)
CHERRY

Cherry has a Janka rating of 950. Not my favorite because it can be very dark with streaks of pale wood. Or put another way, it’s not uniform in color. As it ages it can take on a reddish hue. Plus it can really darken up when a finish is applied.
Pros – –
- Hardwood, great for practical items
- No resin/sap (that I’ve encountered)
- Can be found in home improvement and wood stores
Cons – –
- Medium to very dark in color
- Doesn’t tend to be uniform in color
- Medium to expensive in cost, but generally cheaper than maple
- Can really darken up depending on the finish and the artwork harder to see
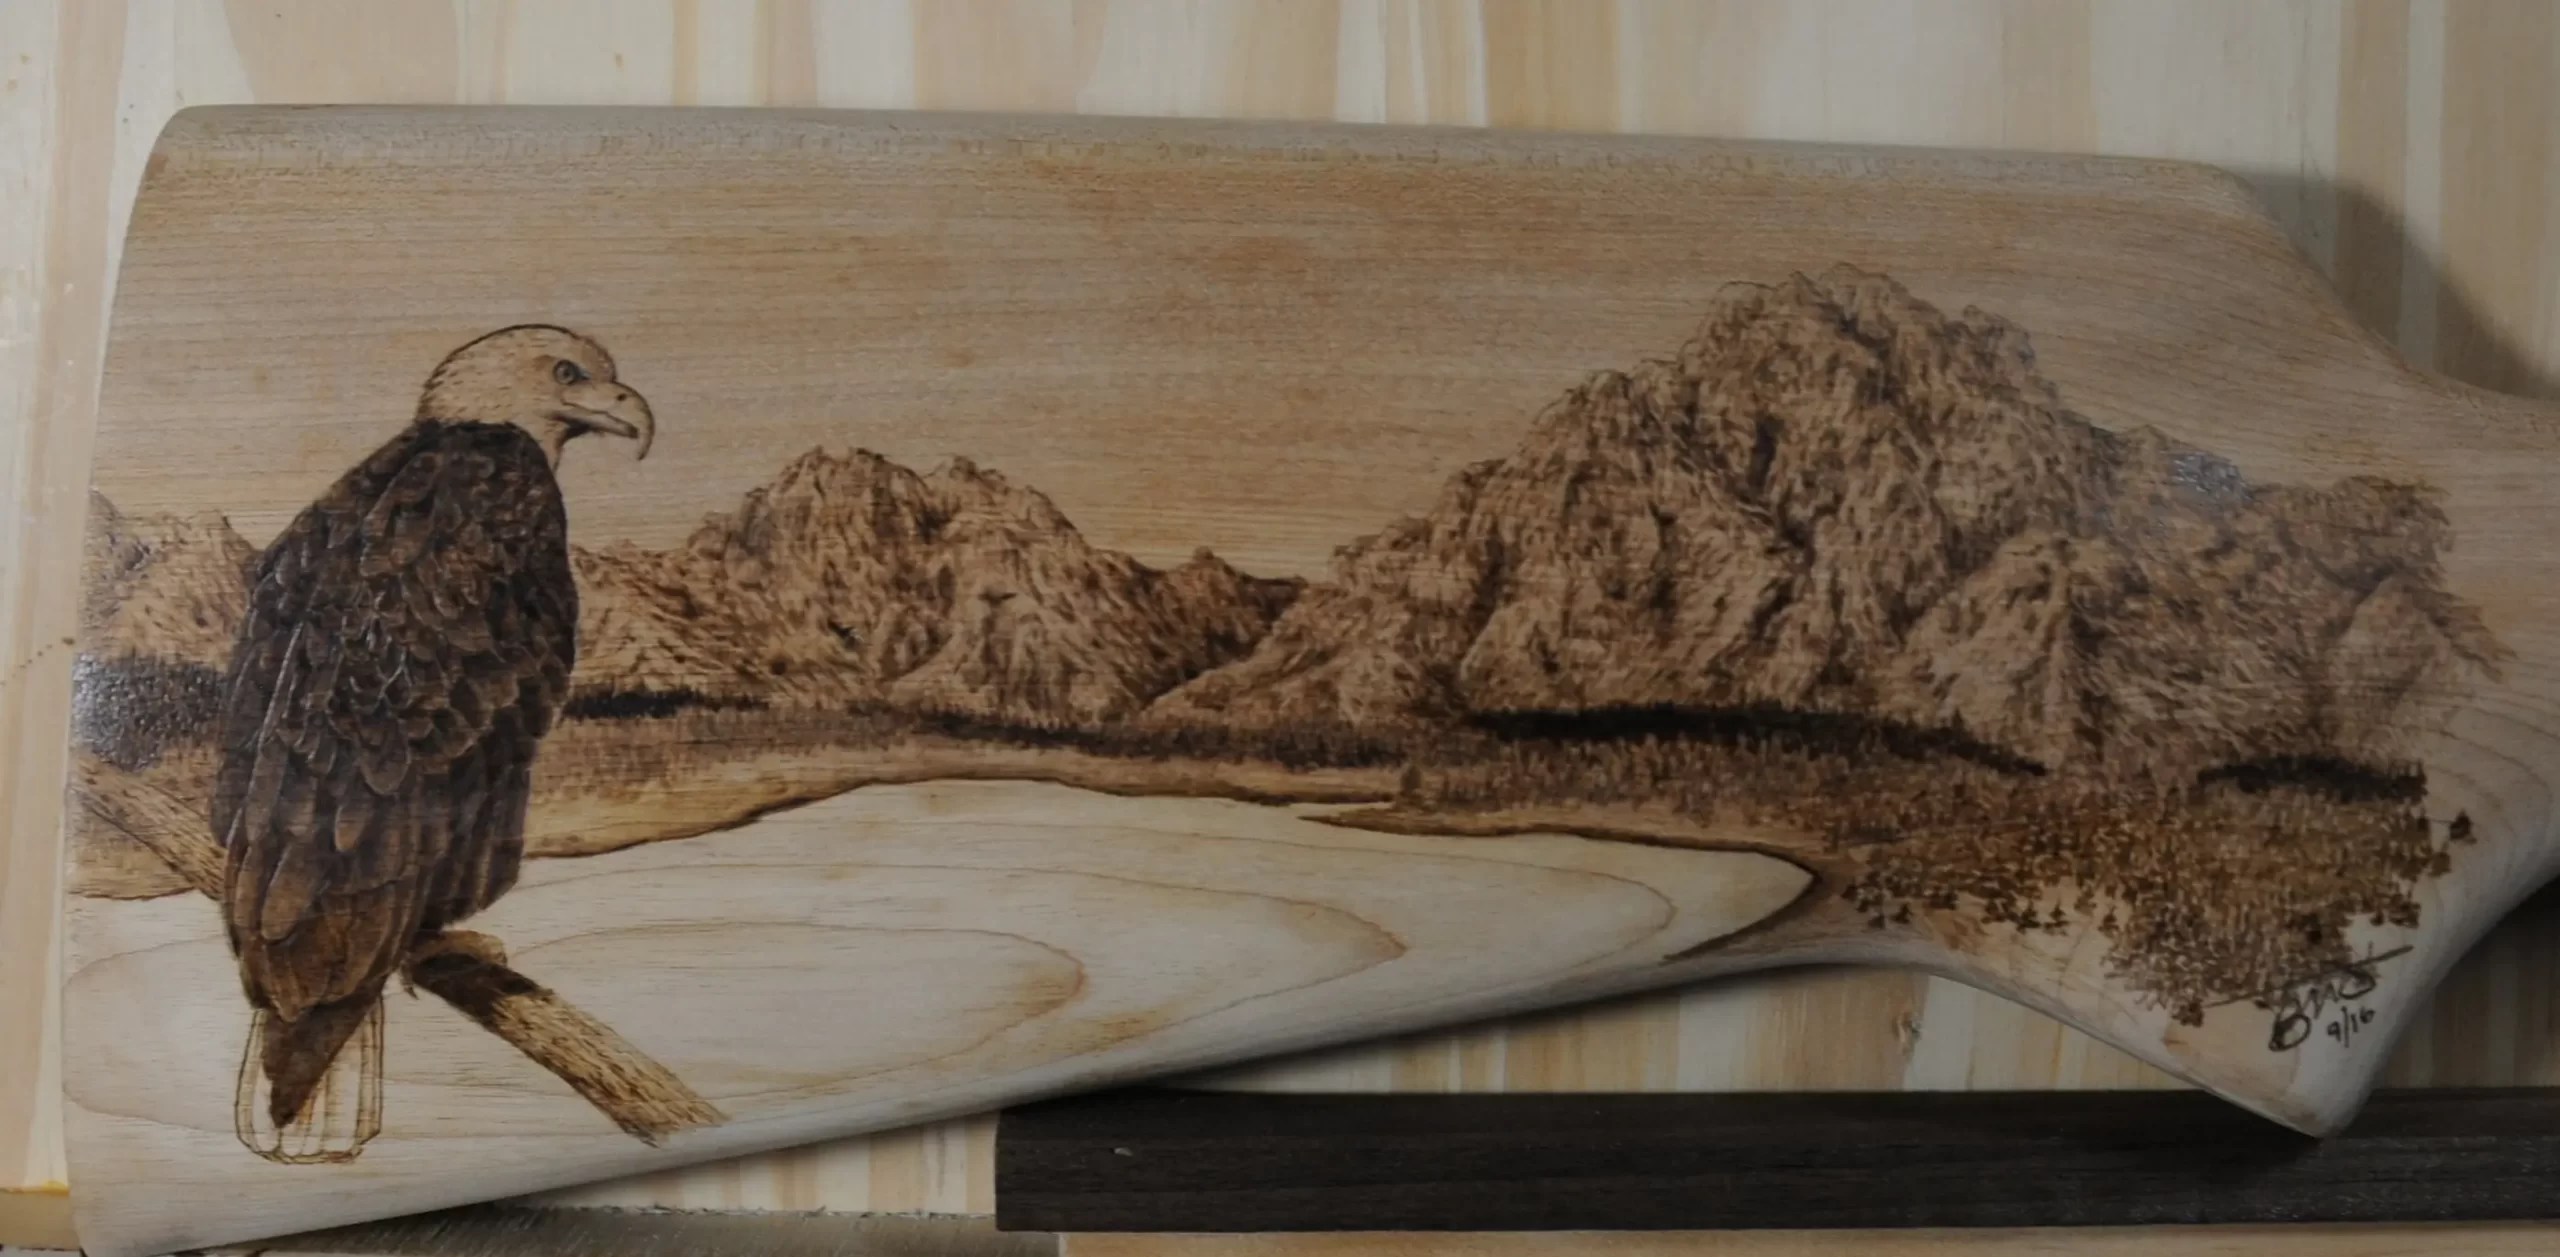 This artwork was burned onto a rifle stock. Todd is pretty sure the rifle was made out of cherry.
HICKORY

Hickory has a Janka rating of 1820. It is the hardest wood that I have burned on, and I hated burning on it. To me it was almost identical to Oak and I really despise Oak. It makes great looking furniture, but features that make it great to look at are the same features that interfere with pyrography; grain lines and tonal variations.
Pros – –
- Hardwood, great for practical items
- No resin/sap (that I’ve encountered)
- Can be found in home improvement and wood stores
Cons – –
- Medium to very dark in color
- Lots of grain and color variations
- Medium cost – more than basswood, less than maple
- I hated burning on it. The grain is very pronounced and hard to burn over. Makes beautiful furniture, but artwork gets lost in the wood grain.
I do not have artwork for this wood. I burned on a small piece to test it out. I hated the experience so much that I had zero desire to try creating real artwork on it.
MAHOGANY
 Mahogany has a Janka rating of 800. I enjoyed burning on mahogany, but it has a really fine grain that gets dark when burned over. The darkened grain gives the board a stippled texture (lots of dots). I found this interferes with creating fine details. It’s not a wood I would burn on again.
Pros – –
- It was easy to burn
- It was easier to fix mistakes on it without gouging into the wood
Cons – –
- Expensive! Double the cost of maple (at least where I live)
- Tends to be a darker wood
- Depending on the location it might not be readily available
- Has a fine grain that quickly darkens when burned over
 This is a test burn I did on a piece of scrap mahogany.
The top image was the unfinished or unprepped side of the board. The bottom image was burned on a properly prepared surface. The fine grain create a rustic texture over the board and I thought that interfered with the detail I was trying to create.
MAPLE (nice to burn on)
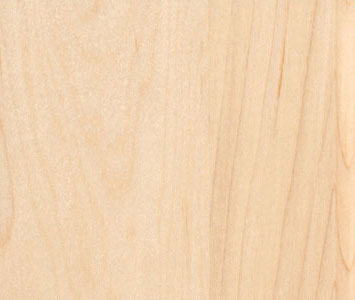 Maple has a Janka rating of 1450. It’s wonderful hardwood, but tends to be expensive. It is another wood that I do like to burn on. If I’m burning on something that will get a lot of handling, say a cutting board or a game board, maple would be the wood I’d choose.
Pros – –
- Light – medium in color
- Can have minimal grain
- No resin/sap (that I’ve encountered)
- Hardwood that can be used in practical items like furniture, utensil holders, etc
- Generally found at all lumber stores and wood stores
- Gouge resistant, so easier to fix mistakes on
Cons – –
- Expensive (generally double the cost of basswood)
- Usually have to purchase at a wood store or lumber yard
- Really wide lumber is expensive! To make it more affordable you can to glue boards together.
- Due to hardness, have to use a higher heat.
- Great option for items that will get a lot of handling – like game boards
 This is a cribbage board my husband made out of maple. I burned the artwork onto it, and this includes the little numbers.
OAK
Oak has a Janka rating of 1290. I absolutely hated burning on oak, and I avoid it like the plague. It has too many grain lines that are very difficult to work with or around. It had a tendency to leave a streaky or banded appearance to the artwork. This wood is my hands down least liked wood.
Pros – –
- Hardwood, great for practical items
- No resin/sap (that I’ve encountered)
- Can be found in home improvement and wood stores
Cons – –
- Medium to very dark in color
- Lots of grain and some color variations
- Medium cost – more than basswood, less than maple
- The grain is very predominating
 This is the photo of a cat I burned on Oak. I spent a lot of time and effort trying to hide or blend the grain lines. I was not successful! That cat looks like it has pale bands running through it. I just hate how this turned out.
OSB – Oriented Strand Board
 I have NOT burned on this board and neither should you!
This board is made out of pieces of wood glued together. When you burn over it you will be burning over areas of glue. Depending on what type of glue was used it can release toxic fumes when heated.
DO NOT BURN ON THIS MATERIAL!
PACIFIC ALBUS
Pacific Albus has a Janka rating of 292. Is a poplar hybrid, but seemed very similar to balsa wood to me. Maybe that’s because the piece I was burning on was thin and not very wide. Not sure. I wouldn’t burn on it again.
Pros – –
- Very light in color
- Minimal grain
- No resin/sap (that I’ve encountered)
- Softer wood, so very easy to create divots, embossed lines, grooves
- Very, very Inexpensive (cheapest of all the woods I’ve burned on)
- Great for practicing, or in my case, demonstrating a technique
Cons – –
- Not readily found. I’ve only found it in one exotic wood store.
- Boards tend to be thin and are prone to curving
- Super easy to gouge when fixing mistakes
- Would only use for practicing
- When burning dark the tip tends to sink into the wood
![]() My logo on pacific albus.
My logo on pacific albus.
PARTICLE BOARD
 I have NOT burned on this board and neither should you!
This board is made out of ground up wood (wood dust) that is mixed with a binder and formed into sheets. When you burn over it you will be burning over god only knows what type of chemicals.
Your health is NOT worth the risk!
DO NOT BURN ON THIS MATERIAL!
PINE
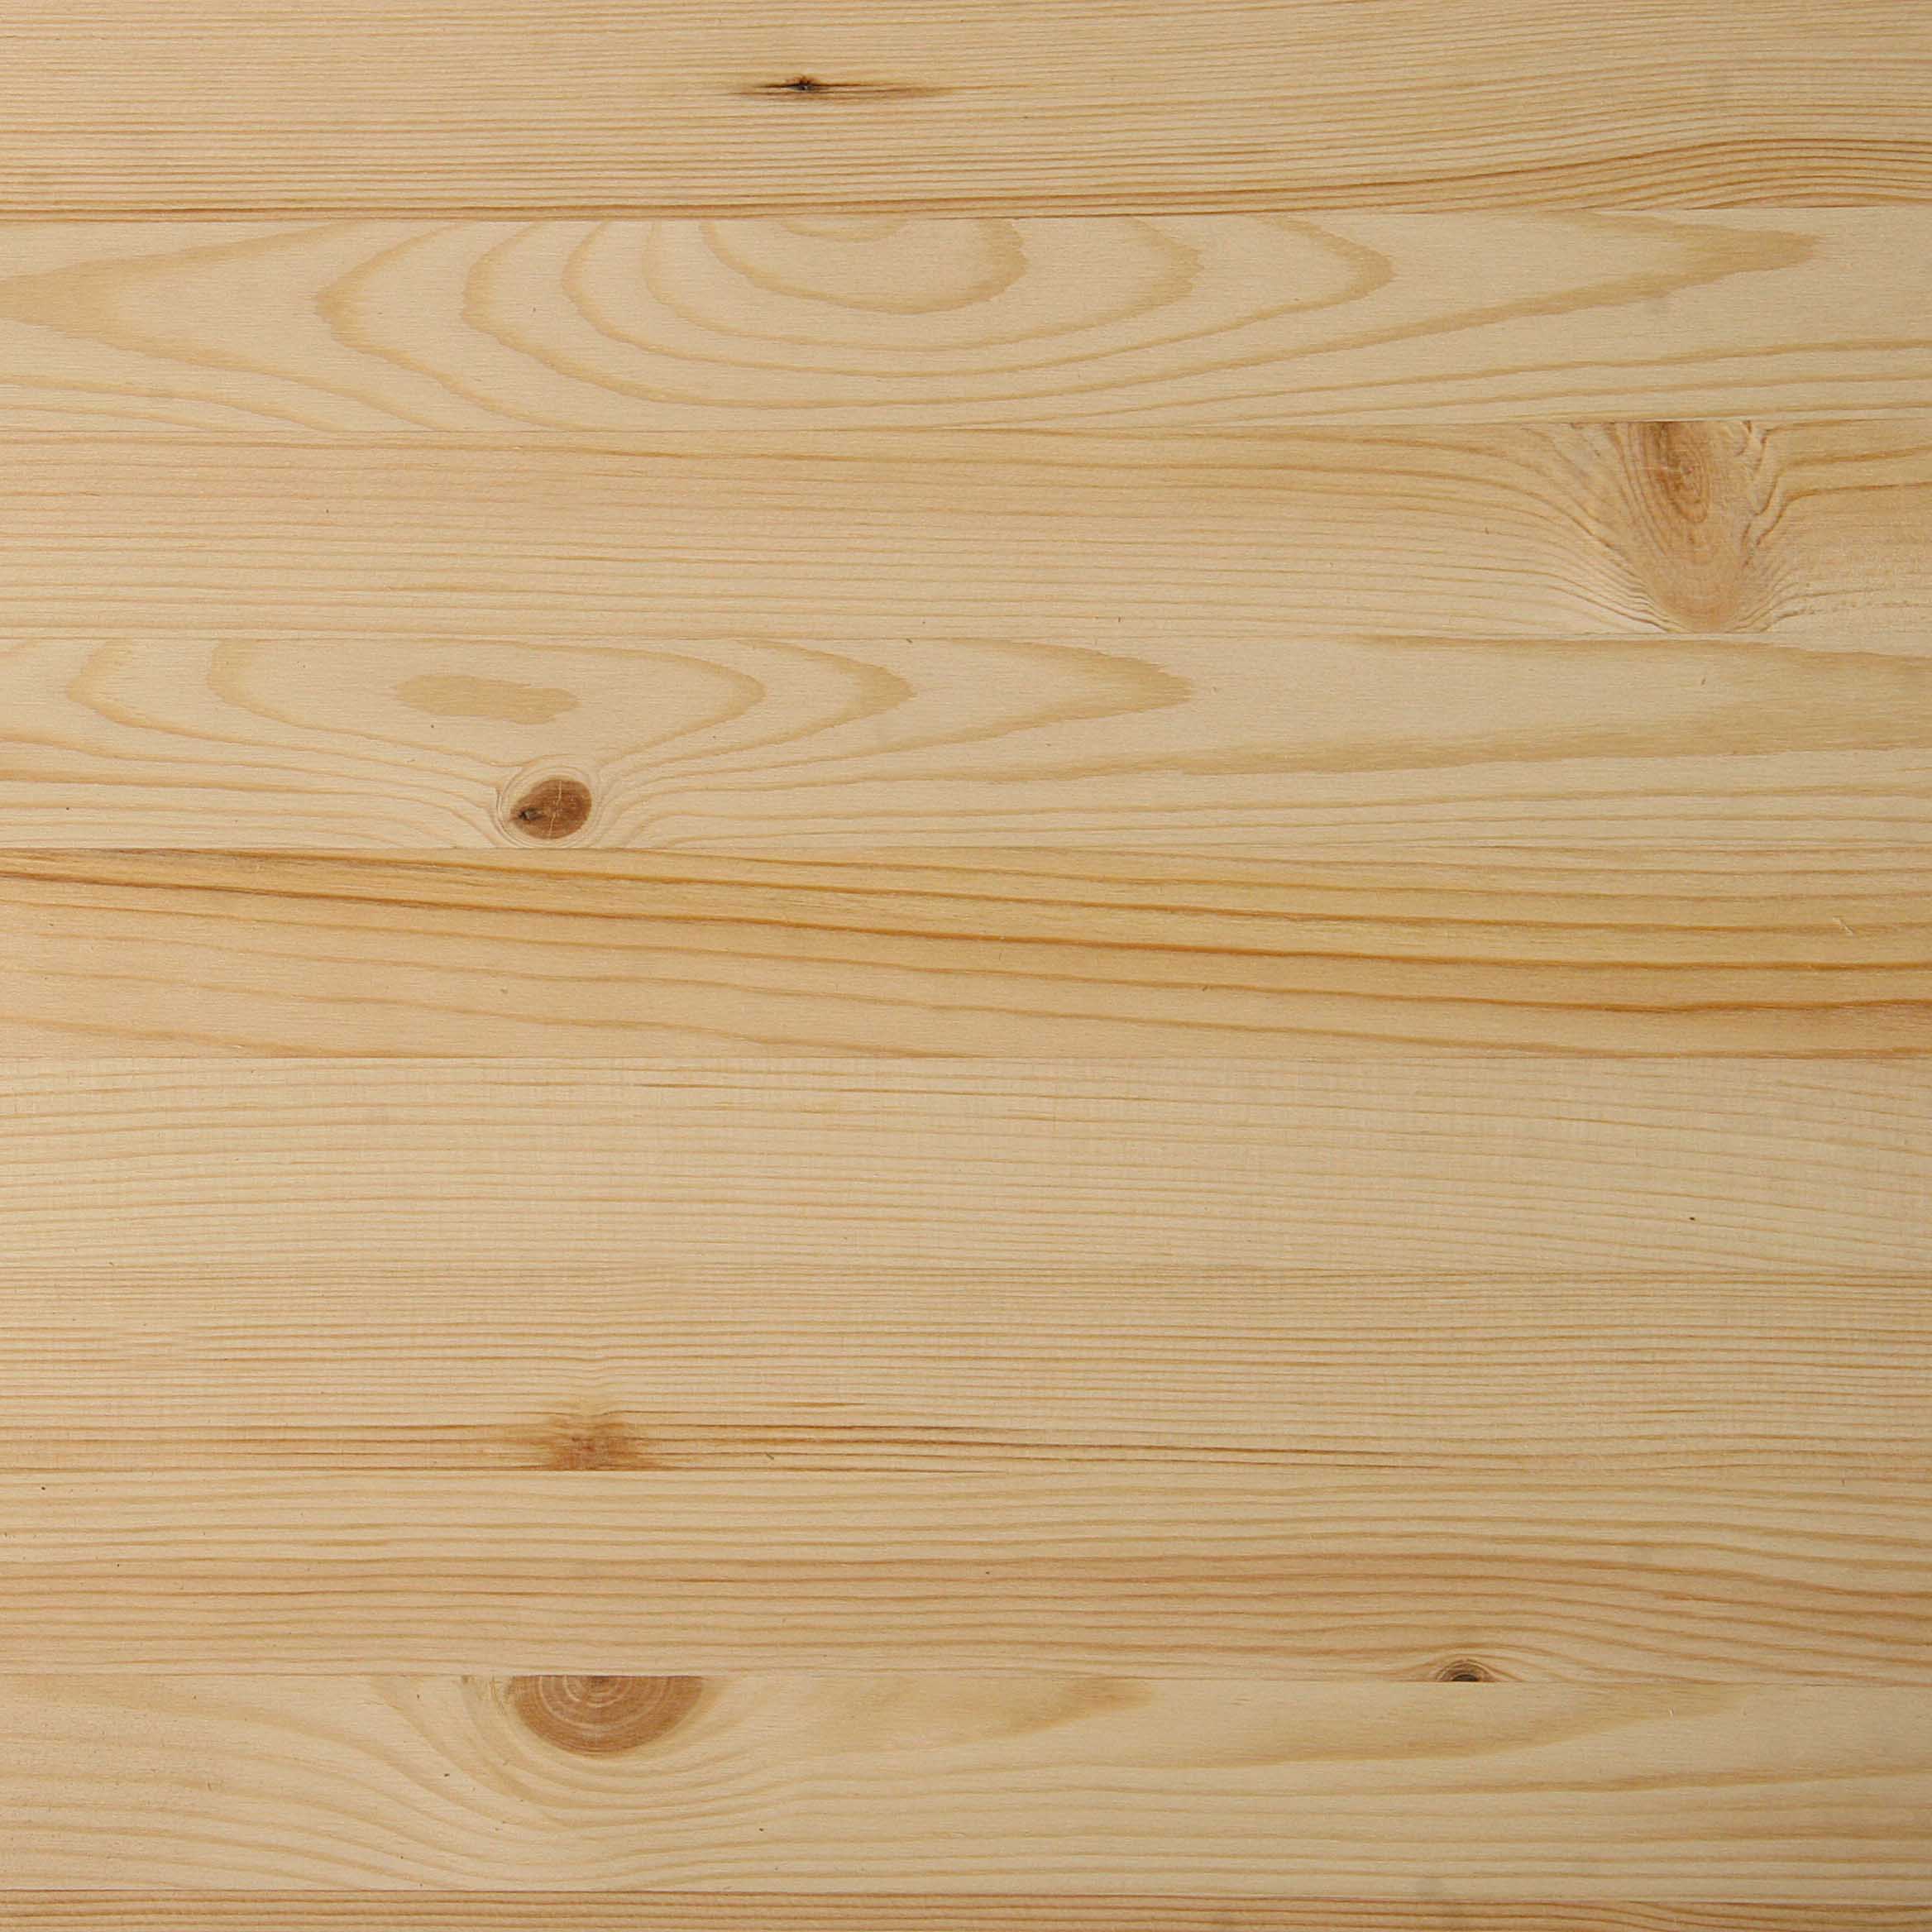 Pine has a Janka rating of 420 or 690 depending on the variety. White pine = 420. Yellow pine = 690. Pine is a very resinous wood. I haven’t burned on very many pine boards, but each one I have burned on ooze pitch. I don’t care for it.
Pros – –
- Light tan in color
- Softer wood, so easy to create divots, embossed lines, grooves
- Inexpensive
- Fairly common. Lots of craft store items use pine
Cons – –
- Has a high resin/sap content
- The wood does not burn evenly. The grain lines get really dark and the adjacent wood barely turns a color.
- When burning dark/high heat the resin (sap) bubbles up creating sticky spots
- I avoid burning on pine. It’s my third most hated wood I’ve burned on (Oak and Hickory being the first and second)
 This image shows a nib holder that Todd made using pine. He ran a torch over the wood and this is the pattern that emerged. The wood does not burn evenly.
PLYWOOD
 The Janka rating of plywood depends on what type of wood was used to make it. The most common is birch, but I’ve seen maple and basswood. Plywood tends to be cheap when compared to solid wood board. Plus it is available in a large variety of widths.
 Most of the die-cut wood, like this teddy bear shaped one, that you find in craft stores is made out of plywood. Generally they don’t tell you what type of wood was used.
 It is always easy to tell if a board is made out of plywood by looking at the side of the board. Looking at the side you can see the wood layers.
Plywood is made by shaving thin sheets of wood from a tree. The sheets are layered in alternating directions, and glued together. I’ve seen thin plywood that only has 3 layers, and much thicker plywood that has 8 layers.
A word of warning. Do not burn deep lines in plywood.
 The top layer of burnable wood is very thin, and you don’t want to get into the glue layer. Fumes from vaporized glue can be toxic. It really depends on what type of glue is use. Since they don’t tell you what type of glue is used, it is best to play it safe and not burn deeply.
This image has a blue arrow pointing to the top layer of plywood. There is also a blue line that matches the width of the top layer in front of the arrow. As you can see, it’s not very thick.
The yellow arrow is pointing to the next layer of wood. Some manufacturers use really cheap wood for theses layers.
 One thing I dislike about ALL plywood is the pitted or slivered surface texture it has. You cannot get rid of this no matter how well you sand.
This photo shows burning on a piece of Baltic birch plywood. The left side was sanded using 280 grit sandpaper and the right side was left alone. The burning on the sanded side looks smoother, and it was easier to do. Regardless, it still shows the slivered texture of the wood.
Keep in mind that pyrography created on plywood fades a LOT more on plywood than it does on solid wood boards. I do want to point out that the pyrography artwork is not actually fading. Instead the board is aging. As the board ages it gets darker in color. The darker it gets the more contrast you lose, so your light burns don’t show up as well.
As for the aging process, the grade of plywood has an impact on this. Generally speaking the cheap plywood you can purchase in large sheets at a home improvement store like Home Depot is a very low grade. You can get artist grade plywood, but those are generally called wood panels. I do have a section on wood panels, so I will go cover them there.
Despite my dislike of the texture I do burn on it. I think plywood is great for practicing. I also do a lot of demo work on plywood. I can easily get plywood in large sizes. I’ve bought boxes of cheap plywood squares (12 x 12 inches / 30.5 x 30.5 cm) on Amazon just for testing out ideas and demo work. For me these plywood squares have the added benefit of not needing Todd to make me a board like I do with basswood.
I wouldn’t burn a commissioned project on plywood because I know that it would fade a lot more than solid wood.
Pros – –
- Can get in a variety of size
- Tends to be cheaper than solid wood
Cons – –
- Has a slivered texture
- Ages faster than solid boards
- Can easily sand and/or burn through the top layer of wood
- Artist grade wood panels tend to be very expensive
 This artwork was burned onto a large piece of plywood. It measures 19 x 21 inches. The moon, the main subject, and the ground were burned. The sky and lightening bolts were airbrushed on. I think I also airbrushed over the ground to darken it up since that was quicker than reburning.
POPLAR (nice to burn on)
 Poplar has a Janka rating of 540. The color and texture reminds me of maple, but it’s cheaper. Well, it’s cheaper than maple where I live. It is one of my preferred woods to burn on. My gripe with poplar, is that the artwork tends to fade more than other boards I’ve burned on.
Pros – –
- Can be light in color
- Can have minimal grain
- Hardwood that can be used in practical items like furniture, utensil holders, etc
- Generally found at all lumber stores and wood stores
- Gouge resistant, so easier to fix mistakes on
- Much cheaper than Maple
Cons – –
- Might need to glue boards together to get nice sized planks to burn on
- Due to hardness, have to turn up heat on pen.
- Can have color streaks and the color streaks tend to have sap/resin spots. I did a sign and the board had this green streak through it and the green streak oozed sap
 Eurasian Eagle Owl on Poplar
REDWOOD
 Redwood has a Janka rating of 420. I was given a small log or branch to burn a simple message on, but I wouldn’t recommend burning fine art on it. It was a very oily wood, and I didn’t enjoy burning on it.
Pros – –
- Was easy to burn on
- Can use a lower heat setting than normal to get dark results
- The grain lines didn’t char like others woods do
Cons – –
- Not readily available
- The red areas on the wood oozes a LOT of sap and actually seemed oily
- The wood is highly figured with numerous red streaks and patches
 Here’s the sign I created.
WALNUT
 Walnut has a Janka rating of 1040. Tends to be highly figured, has lots of grain lines, and gets VERY dark when finished. I would not recommend burning on it as you will have a tough time seeing the artwork.
Pros – –
- Was fairly easy to burn on
Cons – –
- Not readily available
- Expensive. It costs more than maple does
- Even paler areas on the wood get really dark when finished
- Lose a lot of the fine or subtle detail when the wood is finished
 This is a composite photo of a deer I did to test out walnut. The top photo is untreated wood, the middle photo shows the wood after it was misted with water, and the bottom photo shows the wood one coat of Tru Oil was applied.
Walnut is not a wood I would have picked to burn on. I only did a test burn because I had a customer want me to burn on their walnut rifle stock. The customer was going to seal the gun stock with Tru Oil. I did this test burn to show him that paying me to create artwork on his rifle would be a waste of time. Eventually the wood would darken so much that you wouldn’t be able to see the artwork.
WOOD PANEL
 The Janka rating for a wood panel depends on the type of wood that is used. Most of them that I have seen use Baltic birch. A lot of times the panel will have a wooden frame base. This is called a cradled board.
Wood panels are a type of plywood that has been sanded and is ready for burning. They intended to be an alternative to canvases, but since it’s made out of wood I tried one.
The best brand of wood panel I’ve encountered is Ampersand’s unprimed basswood panels. I’ve only seen their panels sold as cradled boards. This just means that the piece of plywood is attached to a wood base. Warning, these panels they are not cheap. Here’s a link to Ampersand’s website. I’m not sure if they sell direct. https://ampersandart.com/panels/unprimed_basswood
Blick art supplies does sell the Ampersand brand of panels. Here’s a link to their site: https://www.dickblick.com/products/ampersand-value-series-artist-wood-panels/
You can add a wooden frame base to any piece of plywood or thin wood. To watch you can click on the video thumbnail, or click on this link: https://youtu.be/8URkMte3ML4
Keep in mind that even though the wood panels are artist grade, they are still plywood. This means their surface will still have slivers of missing wood, but the surface will probably be smoother than plywood bought at home improvements stores like Home Depot.
Pros – –
- light in color
- minimal grain
- ready for use
- found in craft and art supply stores (look in the canvas section)
- Comes in an assortment of sizes from a small 4″ x 4″ to a large 48″ x 72″ (10.2 x 10.2 – 121.9 x 182.9 cm)
- Generally ages better than plywood bought at home improvement stores.
Cons – –
- Expensive.
- It’s still a piece of plywood.
 Here’s an example of artwork I did using an Ampersand wood panel.
MAJOR WARNING!!!!!
NEVER EVER burn on finished wood, reclaimed wood (like old fencing or barn siding) or anything made out of plastic or synthetic material. Yes, I know I already said this, but I’m always amazed at some of the things people will decide to burn on so I’m saying it again. You cannot wood burn without creating some vaporization and your health is worth more than your hobby.
Prepping the wood for optimal burning
All wood needs to be sanded before you burn on it including all items bought at the craft store. I have a 4 step process I use, and I use this on ALL of my boards including plywood and wood panels.
- Sand the board down to at least 220 grit. You may have to start with a rougher paper (60, 80, 100, or 150 grit or all of the then in progression) to get the board in shape for the final sanding.
- After it’s sanded to 220 grit, wet out the wood. To wet out, take a very wet sponge and wipe it over the sanded surface of the wood. The goal is to get the wood wet, but not dripping, it should feel slightly damp to the fingers.
- Let the wood dry. Depending on how much water was applied, this can take 20 minutes or a couple of hours.
- After it’s dry, sand again with 220 grit sandpaper. It should feel very smooth at this point.
The board is now ready for use.
 Why wet out the board? To bring up the grain, or nap, so that during the second sanding it gets removed.
This board was sanded, and then the right side of it was wetted out and left to dry. If you look closely, you can see how rough the right side of the board is.
What is the benefit of this?
- The board will be ultra-smooth board to burn on. Smoother surfaces enable the tips to glide across them easier and allow for finer detail in your artwork.
- Prevents the nap from raising if you brush on a water based finish.
- Prevents the nap from raising if you apply a water based colorant, like watercolors, to your artwork.
- Prevents the nap from raising if there is a humidity change. This only becomes a concern if it takes you considerable time to finish a project. I’ve started projects that took me a couple of years to finish because I only worked on them intermittently. The humidity is not the same during the winter as it is in summer.
What happens if the nap raises? The board will feel fuzzy. It can be sanded off, but be careful so that you don’t remove some of your artwork!
CONCLUSION
That is it for this blog. I will update this blog to include new varieties of wood that I’ve burn on.
Brenda
Originally posted: Dec 19, 2015
Last updated: July 14, 2025
Want to subscribe?
- Click on the “Leave a Comment” field at the end of any post (blog) and a subscribe option will appear.
- Put something in the comment field (if you put “test” or “just subscribing” I won’t make your comment public)
- Fill in the sections for your email address and name, and then click on the “notify me of new posts via email.”
- You will get a confirmation email from WordPress confirming you want to subscribe.
- Click on the confirm button in that email and you’re done.
Please note that I do not send out emails. If you have a WordPress account there is a way to subscribe within the WordPress system, but I cannot provide specifics on how it works as I don’t know.


Wood burning is a beautiful craft to consider for wood workers and wood crafters. It is not that easy though. I tried it once, and the first time was a disaster. But as you have shown in your wood samples and the techniques needed for such burning procedures, there are ways to get the right result expected from the said wood treatment.
Looking forward to reading more of your posts about your wood craft.
I think most people’s first burning would be considered a disaster. 🙂
HI Brenda…not sure if you still check this blog but I am an artist doing a temporary public art commission using an osage orange hedge tree….. I have a poem that I want to wood burn on a flat surface of the tree. Would pyrography work on Osage orange and if so….what would be a good instrument/tool to use
Hi Matt,
I don’t have experience with Osage orange, so all I can recommend it trying it.
Generally with lettering it is burned darkly to make it easy to read. For that any burner would work, including the craft or hobby burners that have solid metal tips.
As for the pen tip type, there are some artist who really like to use ball tips when doing lettering. Just about any shader would also work.
Good luck with your project!
Brenda
Do you burn in paper. If so is there anything i need to do to it prior. Any tips?
Thanks, Lois
Hi Lois,
Yes, I’ve burned on paper several times. There is nothing you need to do to get the paper ready for burning.
I recommend using 100% cotton, acid-free watercolor paper.
I wrote a community post on YouTube that goes into greater detail. Here’s a link to that post: https://www.youtube.com/post/Ugx34qu4aSSYufZs9Sh4AaABCQ
Thank you for such an informative site. Can unfinished teak be used for pyrography?
Hi Christine,
I haven’t burned on teak, but I did look it up on the toxicity chart. The chart warned it can be an irritant to some people, so if you burn on it make sure you are in a well ventilated area. That’s a good thing to do anytime you’re burning. I don’t see why you couldn’t burn on teak.
Teak tends to be a darker colored wood. At least the pictures I’ve seen it seems dark, so tan burn results probably won’t show up. Silhouettes or dark solid shapes would should show up though. Try it out and see what you think.
I’ve tried burning on teak as I’m from the Caribbean where it’s more common and it is a darker wood so things like quotes or block letters work really well. Anything with finer details may not be as easily visible. Hope this helps.
would rubber wood work??
Hi Steven,
I haven’t burned on rubber wood. I did look it up to see if it was considered toxic and the general consensus was no. Unless you’re allergic to latex, then avoid it at all costs.
That said I don’t see a reason why it wouldn’t be a problem to burn on it. Take normal safety precautions like burning in a well ventilated area and see what you think.
I have been wood burning pet memorials on urns and plaques. Since I do not have great knowledge on various woods; I have had many challenges on getting the correct techniques on not using the correct nips; but issues with setting heat and pressure. After seeing your blog; it gave me a better understanding on “So Many Reasons” that I have to consider. Thank you Brenda for sharing not only the pros and cons; but showing us your work vs the woods that you have used. Truly appreciate it. Bob
Hi Bob,
glad the article was helpful.
I have some pieces of elm that I cut from my dad’s farm. They are dry. Is elm safe to use in pyrography, or is it one of the toxic woods?
Hi Phillip,
Great question. I looked up elm on the wood database and the mountain woodworker’s list of wood, both said the same thing: dust can be an irritant. I think most wood dust is irritating, so it’s not a surprise about that. One did say that there is a rare chance of nasal cancer, but I would assume that’s from dust exposure and probably lots or prolonged dust exposure.
Here’s a link to both places I checked:
https://www.wood-database.com/wood-articles/wood-allergies-and-toxicity
https://www.mountainwoodworker.com/articles/toxic_woods.pdf
Based on the two websites I’d say the wood is probably safe to burn on. Keep in mind we are all different and what might not bother one person could be an irritant for someone else. That said I’d recommend taking some normal precautions as you should with all burning: burn in a well ventilated area, try not to create a lot of smoke, and don’t have your face hover directly over the board when burning.
Brenda, Thank you, for your reply. This is helpful information. More than anything it is useful to have a person with experience to confirm what I think I am reading.
Sincerely,
Phillip Fitzsimmons
Hi there! I just found you because I bought some plywood shapes from the craft store and I’m not sure if I should burn them or not so I did some Googling and your page came up.
Now having read through this I want to say, I agree with *almost* all of your wood assessments accept for the Alder (in this case knotty Alder). My husband brought home some scrap bits from his cabinet shop and I piddled around with one a few months ago and it was lovely! Not too dark at all. The burn (with my bleh crappy tool at the time) was smooth and definitely dark enough to see. I even finished it with a paste wax he made from beeswax and mineral oil and it was just perfect. Here’s a link to a picture of it if you want to see (I’m not the best artist so it’s not terribly refined) https://imgur.com/a/8YTfd5D. It ended up becoming part of a teacher gift. I know there is another kind of Alder and maybe that’s what you tried, so I can’t speak to that, but I will say my experience with Knotty Alder was pleasing and I’m looking forward to burning on it again, next time with your wet sanding technique. That was new info to me!! Thanks!
Anyway, I’m very happy to have a few more wood types to try burning, though Alder, Poplar, and Beech are probably going to be the most often used as he gets those as scraps for free from work (otherwise it just gets thrown out). I am also…pretty sure I’m going to save those plywood shapes for painting projects instead. They’re so thin I feel it will be VERY difficult not to burn them too deeply as you suggested. On to another solution for my project idea (I hope).
Hi.
I’m not sure which species of alder I tried, but like you said there are several varieties. That’s awesome you can get free scrapes to burn on! I’d would burn on them too if I was in your shoes!
Thanks for sharing your artwork with me. It’s was very nice and I’m sure that the teacher loved it!
Thanks again for the comment and I hope you will continue to enjoy pyrography!
Brenda
Um…so…it’s 3.30am UK, stayed up due to Capitol shenanigans…but some.hours ago I fired up my brand new pyrography tool. I used a piece of salvaged board…reading about the DON’T use salvaged board long after I finished working on it!!! Room had some ventilation but I’m now sleeping…trying…with window wide open above my bed with minus temperature air flowing in. Big headache and a touch worried to sleeping…um…suggestions please? Thanks.
Hi Lucy,
I’m not sure I can offer any suggestions other than what you did – get fresh air. If the headache hasn’t gone away or you start having problems breathing then see your doctor!
Excellent blog post – I’m looking for a box for a client and wanted to know what it was like to burn on cherry. I think I’l stick to maple! Thanks!
Thank you. Good choice.
Cherry is beautiful for furniture, but not great for pyrography art.
Hi Brenda. Looks vex all your blogs and videos. I want to make keepsake boxes for my family for Christmas
and have purchased basswood boxes. I would like to burn something on each lid (inside and out) and on the bottom inside of the box. I have read all your related blogs but still am a little unsure. Do I wet down both the inside and outside of the box and say three standings. Also in finishing would you recommend
a spray finish and if so which one. Thanks for all your help.
Hi Betty,
I wet out (lightly) every surface I will be burning on to ensure it is ultra smooth.
Spray finishes are the easiest and I would use either a satin lacquer or polycrylic. As for which brand that is more dependent on what is available where you are at. I live in a small town, so my choices are very limited. Quite truthfully I doubt any of them are that different from each other.
Have fun with your keepsake boxes.
Thank you. It is very helpful.
Hi Brenda !! Thank you for this great information I bought a wood burning kit and I never used ..i will practice before making my project . My question is I bought a 2” thick 30”x30” maple wood cookie I went online and they recommended to seal it ..I hurried and tried to buy what people recommended . Anchor seal classic was the recommendation on newly cut wood . I applied on both sides and I will let it cure for maybe a year , what I didn’t know it’s a wax kind of product , I am planning on sanding this to smooth it I didn’t do any sanding before applying this product . Will I be able to do this art project after I stand it or the wax will prevent me from burning the wood ? If it’s well sanded and the coating is all gone it should be fine right ? Now my second question when you want to add color to your project on wood cookie what brand pain do you use and what type of sealer do you apply to make it last ? It’s going to be a plaque for wildlife habitat so it’s outside in the element rain , snow, sun ? Thank you very much I should have research maybe more before applying this coating but people were saying when a tree is cut down you have to seal the end has soon has possible like right after it’s cut down to prevent cracking . Thank you very much .
Hi Brigitte,
Todd said that the general rule of thumb is 1 year per inch of wood, so it might be two years before the wood it ready. There are a LOT of variables to that, so don’t take it as a set in stone rule.
Yes, just make sure that sand down far enough to remove all traces of the product that might has soaked in. Since it is waxed based I would venture a guess that it didn’t penetrate too far.
The most durable outdoor finish is Spar Urethane. Make sure you get the variety rated for outdoor use. Keep in mind that even though they claim their product is clear it does impart a yellow tinge to the wood. How much of a tinge varies depending on the wood.
As for paint. I don’t paint and I have very limited experience with paint. What I would recommend is using products that have high lightfastness ratings. Regardless of what medium you use to add color, the color should have a high lightfast rating.
You have time before the wood will be ready, so now is the time to start experimenting and planning.
1) First decide what type of color (watercolor, acrylic, colored pencil, etc) you want to add.
2) Then see which colors are available with a high lightfast rating. This can vary depending on the brand. For example, faber castell polychromos colored pencils has more that are rated very high than prismacolor premier does.
3) Apply color to a scrap piece of wood and apply the finish over it.
4) Let it sit in a sunny location and see how it ages. You should know in a couple of months if there are colors you should avoid and how much the finish will interact with the color.
Hope that helps,
Brenda
I have been wood burning for years as a hobby and I give my work as gifts for birthdays and Christmas gifts. Although I am not nearly as talented as you are. I started out with a fixed tip wood burner I purchased in a hardware store and wood burned an owl which everyone seemed to love and someone even bought it. Yet I have not really got into the selling of my artwork and actually still burn for pleasure and gifts.I am near to 71 now and still love to burn and find that the preparation is half the pleasure of a good project.I could not agree with you more when you say to be careful about what kind of wood you burn on such as finished wood because your face is close to your work. I have even gone as far as turning on a fan to draw the smoke out of the immediate area and a window fan to draw the smoke and fumes out of the room I am working in. My wife is my biggest fan so my walls are adorned with burnings I have done for the past 40 years or so yet I knew people in the past that purchased a few of my burnings and they are now in Australia, Great Britain, and somewhere in the US, I think Las Vegas. I do not mean to sound like I am bragging at all about that. The thing is I work mostly from patterns but have drawn some of my own. Could you recommend a source for some good patterns and I do not expect them to be free And also I use a colwood interchangeable tip burner and could you recommend a good tip package that I can purchase that basicaly covers most of what I am looking for such as animal fur, human hair, and intricate design such as leaves flowers and such? Love your artistic talent I am a fan.
Hi Michael,
thanks for the comment.
I think there are only 2 pen tips that are essential: a writer and a shader. With those two you can create just about every including the textures you mentioned. I’ve written a blog about pen tips, have a youtube video, and recently did a community post on my YouTube channel about pen tips. The community post would answer most if not all of your questions. It is about a week old, so can be found easily. Click on the ‘community’ tab on my youtube channel and the post is around the 4th one down.
Blog: https://wp.me/p8j0lZ-2wa
Video: https://youtu.be/B-HaQlnoAyE
Community Post – I don’t have a way to provide a link to, but here’s a link to the my community page: https://www.youtube.com/c/PyrographyMadeEasy/community
As for patterns I don’t have a clue as I’ve never gone looking for patterns. Almost every single tutorial on my tutorial page includes a free pattern. Plus I have a number of patterns for sale on etsy. Other than that I can’t help you there.
Hope you continue to enjoy pyrography and thanks again for the comment.
B
Olá Brenda! Seus trabalhos são fabulosos, perfeitos. No meu caso, existe um grande problema, pois as madeira que você cita, não encontramos em meu pais com facilidade, ou seja, para consegui-las teremos que pagar bem mais caro, pois trata-se de exportação, etc. Opá… sem saída. Ou deixo a arte do lado, ou vou mudar para teu país. rsrsrsr (risos). Aqui no Brasil, as madeiras boas para essa arte com superfície dura ( mais ou menos) são muito escuras com machas que atrapalharia no resultado final. Bom… vou seguir minha saga em busca de um achado milagroso.
Marcus bastos
Oi Marcus,
encontrar uma madeira semelhante pode ser difícil. Muitas pessoas, inclusive eu, queimam em compensado. Geralmente é mais barato do que placas sólidas, mas, novamente, pode não estar disponível em sua área. Eu sei que painéis de compensado de bétula estão disponíveis na Amazon, mas dada a sua localização, os custos de envio podem ser terríveis.
Você já pensou em gravar no papel? É leve e geralmente mais fácil de obter. Eu recomendo papel aquarela 100% algodão prensado a quente com 300 g / m² de gramatura. Com o papel, você não precisa lidar com linhas de fibra e é fácil de emoldurar.
Minha marca favorita é minha Winsor & Newton. aqui está um link para ele na Amazon para que você saiba do que estou falando
https://www.amazon.com/Winsor-Newton-Professional-Watercolor-Pressed/dp/B01MZBVKXW/ref=sr_1_4?dchild=1&keywords=winsor+%26+newton+140lb+hot+press&qid=1597687450&sr=8-4
Brenda
Hi Brenda,
As with everything, this is really useful information! I followed these preparation steps. I have used basswood boards that you can buy in craft shops – they are about 3/4″ thick. One of the boards warped a bit and also got a small crack at the edge. That’s OK – I can deal with it, but do have two questions:
(1) can you provide hints on how to avoid this in the future – perhaps it was a bit too wet, or I should’ve let it dry lying flat rather than standing up the way I did;
(2) do you think there is a risk of further cracks if I try to nail a saw tooth hanger to the back? Should I perhaps use some other hanger that can be applied differently?
Thanks,
Marlies
Hi Marlies,
wow, I’ve never had a board that thick warp. I asked Todd and he said that the board should never be super wet; especially if you live in a really dry climate. Phoenix Arizona is a good example of that. Instead just a light misting of water is all that is needed. Never soak the board. Really dry climates cause the ends of the board to dry super fast compared to the center.
You can dry the board laying down or standing, it shouldn’t matter.
If the crack is small, place scotch tape on the front and back side of the board so that the tape covers the crack. Make sure the tape extends to the top or the edge of the board where the crack starts. Prop the board up on its side so the crack is on top and fill the crack with super glue. The tape will keep the glue from running out. Let it dry and then remove the tape. You might need to lightly sand to smooth out the area, but the crack shouldn’t get worse.
Avoid adding a hanger on or real close to the crack. Todd said that once a board starts to crack is wants to continue.
You can always use a picture frame wire hanger like they type used in fine art and for large pieces. Here’s a link that shows a picture of what I’m talking about:
https://www.unitedmfrs.com/Prepack_Picture_Frame_Hanging_Kit_1_Bag_p/926h.htm
I’m not promoting this particular brand or seller, it was just the first one I found that clearly showed what I’m talking about. I use this style on larger pieces where I wouldn’t trust a sawtooth. I also use it cradleboards as sawtooth hangers don’t work on those – at least not in a way where the board stay flush on the wall. If you google “picture frame hanging kit” or something similar you should get a number of results to choose from.
Hope that helps.
brenda
Thanks for your quick and helpful response, Brenda! I have just applied the scotch tape and poured in super glue, so sure hope that prevents the crack from extending.
Hi Marlies,
It worked for me, so hopefully will work for you too. Still very odd that the board would warp and crack to begin with. Makes me wonder if there was a flaw in the board.
Hello Brenda
Can you write what kind of tree you recommend? And is it also possible to have plywood?
Hi. As I said in the blog, Basswood is my favorite. I altered the blog a bit to make this a lot easier to see. Basswood is also called linden, common linden, and common lime.
Yes, plywood is a suitable surface to burn on as long as the top layer is solid wood. DO NOT burn on OSB boards – oriented strand board. These look like the top layer is made out of pieces of wood haphazardly glued together. Also do not burn on particle or MDF boards. The wood is ground up, mixed with binders, and formed into a board.
Hi Brenda, as bought chopping boards are often treated – is it best to steer clear from burning them or is it possible to sand them down and use them maybe with a face mask and eye wear? Without help, it’s not easy for me to shape boards and sometimes you can pick them up cheap but they are already treated 🙁 Thanks, Beki
Hi Beki,
I had to ask Todd about this as wood finishes are his realm. His condensed answer is a very cautious yes, but you need to sand a LOT. You should remove 1/8 – 1/4 inch (0.3 – 0.6 cm) of wood to ensure you have removed all of the sealant. The harder the wood the less the sealant can penetrate, so not as much wood needs to be removed. Mostly likely you wouldn’t know what type of wood is being used, so remove extra to play it safe.
That said, we both recommend that if you do burn on one to make sure the area is extremely well ventilated. Put the board on a easel or prop it up against something like a large paint can so that your face is not hovering over the board while you burn. I highly recommend using an easel and Amazon sells a number of different types for under $20. Look for tabletop easels. Also use a fan to suck any smoke or fumes away from you. While pyrography is a lot of fun, it’s not worth risking your health!
With your last question I already mentioned this, but I’ll say it again. If this is going to be a functional chopping board, then make sure to seal it with a food grade safe sealant like food grade mineral oil. Keep in mind that this will darken the wood, so don’t burn a really complex design with lots of gradient shading as you’ll lose most of the light tan colors after the board is sealed.
There are other types of supposedly food safe sealants (like shellac), but Todd doesn’t have any experience with them, so doesn’t feel comfortable recommending any of them. Whereas the food grade mineral oil can be bought in drug stores (at least in the USA) to treat constipation, so if it is safe enough to consume it’s safe enough to be in contact with food. You can even add a few drops of essential oils to give it an aroma. We use lemon or orange, but keep in mind that the aroma only lasts for a couple weeks at the most.
If the board will be decorational (wall hanging) then I’d use polycrylic for the sealant. I would not trust the sealant to be food safe despite the manufacturers claim, but that is just me. Now if you trust the manufacturer, the key to getting a food safe finish is to allow the finish to FULLY CURE which takes a minimum of 30 days. Polycrylic doesn’t make the wood change colors near as much as mineral oil, so with that finish you could do gradient shading.
Hope this helps.
Brenda
I found the best product for food grade finish on wood . I sealed my wood counter top 4 years ago it’s food safe and it’s still Beautiful like brand new the product is called Emmet’s good stuff finish . It’s better than mineral oil because you don’t have to reapply it after a few months .
Hi Brigitte,
Thanks for sharing the information!
Todd only uses oil on cutting boards and wooden trivets.
Thanks again for the info
B
Have you worked on bamboo… or more specifically wooden spoons? Thoughts?
Hi Carly,
I have not burned on either. My only thought on the spoon, and the bamboo for that matter, is to make sure it doesn’t have a finish on it. I’ve seen a number of artistic works on wood spoons, so obviously it can be done.
Have fun!
Hi Mike,
I am most likely using the J tight round shader. What makes my shader look so different from Colwood’s website is that I bent the tip to a 45 angle. Colwood now offers to bend pen tips and they bend them along the thick wire connection instead at of the thin metal end like I did. My method can break the tip off of the pen, so I don’t recommend it. I also want to point out that if you bend your own pen tip, it will void the warranty.
Another shader that I think is very versatile is the D shader. It has different sides or angles along the edges that can be used to create a great range of burn widths. Again it is another shader that I’ve been the tip on to a 45, so that it is more comfortable to use.
Hope that helps.
Brenda
Can you use underlayment board to burn on?
Hi Margarer,
I’m not 100% sure what underlayment board is. If it is regular plywood, then yes. Plywood is sheets of thin wood glued together. Just don’t burn really deep as you don’t want to get into the glue layer.
If you are referring to MDF then no. MDF is made by taking wood fibers and mixing them with glues and resins. This mixture is poured out and formed into sheets. The heat from your burner could cause the glue and resins to release vapors that could be very harmful to your health.
Art is not work risking your health over!
Hope that helps.
Brenda
Do you always use store bought wood, or do you go out and cut your own too? And if so, how do you dry it without splitting it or using sealant?
I cut wood for a living, so I take home slabs for wood working. I try to dry them slowly to reduce the chance of splitting, but it’s very disheartening to see a piece that you really wanted to work on split on you. I’m afraid to use sealants other crafters recommend due to the possible vapors they’d be letting off.
Hello Agnieszka,
We always buy store bought wood, so we don’t have any experience with that. I did a quick internet search and I found a short youtube video that said you can seal the ends with melted wax. Here’s a link to the video: https://www.youtube.com/watch?v=JpD2XZUJ0Ts
I would think that if your wood is too large to dip like the video shows, you can always pour melted wax onto the exposed wood surface.
Thank you for your question and I hope that helps.
Brenda
My friend wants me to burn a cutting board for him and I’m leaning maple. Do you think that’s a good idea? What kind of oil should I finish it with? Thank you!
Hi Geneva,
Maple is a wonderful choice for cutting boards as maple is a hardwood that can handle the use cutting boards get. Todd always uses food grade mineral oil on the cutting boards he makes. When you oil the board for the first time, it will take several coats of oil before its ready. The board is ready when it quits absorbing the coats of oil.
Hope that helps and have fun with your project!
Brenda
Hi Brenda, would you say that there are any specific pyrography pens that are better suited to different types of wood?
Hi.
Nope. The only difference between the woods from a pen tip aspect is the temperature you need to burn at. Hardwoods require a higher heat and softwood a lower one.
Brenda
hi Brenda, I have what I think is an old Russian birch carved and burned picture . it is very intricate and quite lovely. Can you give me any help in finding out value, etc. I know nothing about this. there is writing and a signature on the back in what I believe is in Russian. I can send you pictures of it as well as signature if you are interested. Many thanks for any assistance in this matter, Linda Stell
Hi Linda,
I would love to see it. As for it’s value, my first inclination is to try an internet search on the artist name. You might try googling Russian pyrography artists and see if you can find something on the internet with his signature. Another idea is too look for places that will do art appraisals. Maybe a local art gallery could provide information and/or direct you to a place that could.
As I said, I’d love to see it. Please send me a picture to: PyrographyMe@gmail.com
Brenda
Hi Brenda … I love your videos and your blog … I love how honest you are in your descriptions … its very helpful to see one as talented as you are and to know what to do and NOT do …. thank you and I will be continuing to follow you … Nancy
Hi Nancy,
thank you so much. I really appreciate your comment and I’m glad the site & channel are helpful.
We all have to start somewhere. My first attempts at pyrography were not; at least I don’t think so. As I’ve continued to practice and push myself I’m learning more and more what I can do in the medium. The best part is that I’m having a lot of fun, encouraging others to try the artform, and meeting some wonderful people. Can’t ask for more than that! Ok, I could ask to win the lottery, but there’s no point in pushing my luck. 🙂
Brenda
Thank you Brenda for all of this helpful information. My husband is new to woodburning and has burned on a slab of Birch that we purchased at a craft store. Would you seal over the little edge of bark that shows or leave that as it is?
Hi Peggy,
Welcome to the wonderful world of pyrography! I hope you husband enjoys the artform.
As for your question, the answer is yes. Any exposed wood surface will dry out and with the bark that means it will fall off. There isn’t a guarantee that the bark won’t fall off in spots over time, but sealing it will help as it acts a bit like a glue. Hope this helps.
Brenda
Hi. I, personally, am not a fan of balsa wood because it is extremely soft. I can carve or gouge it with my fingernail. I prefer Basswood, followed by maple and then poplar. Basswood is my favorite for wall art as it is the least expensive of the three and tends to be very pale in color.
brenda