 In this tutorial blog I’m going to explain how to create some festive holiday decorations using small white pumpkins. Real pumpkins. I created three different designs and accented the designs with colorful metallic paint. Not only is this is a super easy project that you can customize to your preferences, but it is also a lot of fun to do.
 Click on the image to the left to watch a YouTube video version of the tutorial. Or click on this link: https://youtu.be/s9KScxaw_oU
MATERIALS NEEDED:
- Small White Pumpkins (real pumpkins)
- Assorted Pen Tips (types covered in each pumpkin section)
- PearlEx pigment powder
- Clear glue
- Embossing tool
I’m using real pumpkins I bought at a grocery store. The pumpkins are small and pale in color.
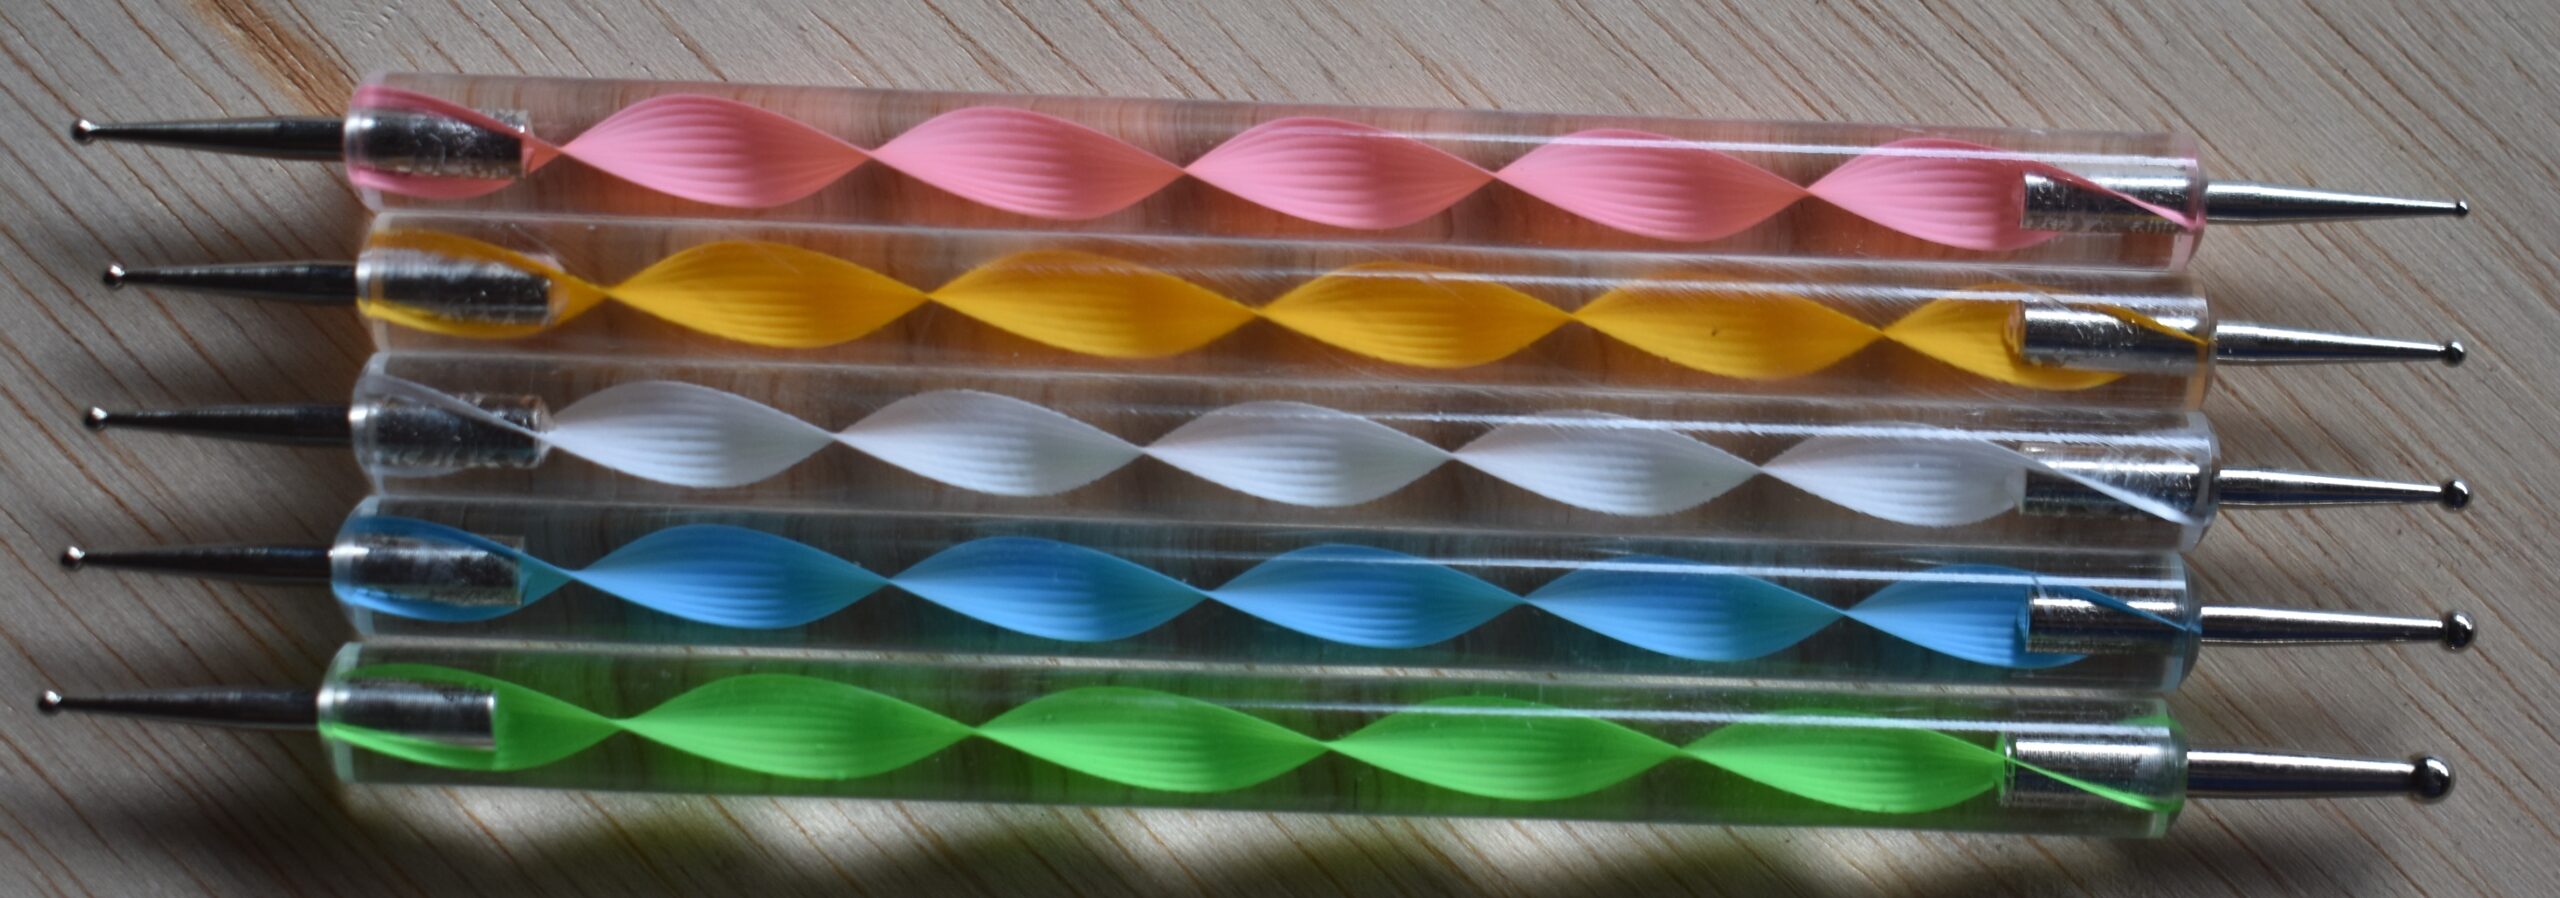 I’m using embossing tools as my means of applying paint. This set has an assortment of different sized ball tips, and can be found on Amazon and craft stores. The set isn’t very expensive, but you can use other items like a toothpick or the handle end of a paintbrush.
Here’s an Amazon affiliate link: https://amzn.to/3uAC7o3
PearlEx Colors Used
Pumpkin 1 = Super Russet #654, Turquoise #686
Pumpkin 2 = Interference Blue #671, Reflex Violet #644
Pumpkin 3 = Salmon Pink #642, Silver #663
In the Alternatives section, I will provide some alternate color ideas you can use.
I only used two colors on each pumpkin. I’m not very good with color, so I tend to keep things to a minimum. Also, I didn’t plan any of the pumpkins in advance. Instead, this was all spur of the moment and make up as I went, so don’t judge my pumpkins too harshly.
Here’s an Amazon affiliate link: https://amzn.to/3QVThpr
MAKING PAINT
PearlEx is a dry powder, so you have to mix it with a binder of some sort. This can be paint (watercolors, acrylics, etc), varnish, or even glues.
I’m using clear Elmer’s glue because it preserves the metallic sheen of the paint.
This photo shows the metallic sheen of the pigment.
With my first pumpkin I used white glue, but discovered it greatly reduces the metallic sheen.
This is the pumpkin I used white glue as the binder for the pigment color. There isn’t much metallic sheen, and I was very disappointed with the results.
Yes, I could have re-painted the pumpkin, but I was too lazy.
Squeeze a small drop of glue into a mixing well. I’m using a cheap and very inexpensive craft paint palette.
As you can see, mine has been used a lot, and I’m not very good about cleaning it thoroughly when I’m done.
Next, use a dry, clean paint brush and scoop a small amount of pigment.
Drop the pigment onto the glue and start mixing.
Stir until the pigment is completely mixed in, The resulting mixture is the paint we’ll use.
Remove the excess paint from the brush by scraping the paintbrush on the side of the well.
I won’t go into the details of mixing the paint again. When I say the word paint, just know that I’m referring to the glue and powdered pigment mixture.
There are many things you can use instead of PearlEx pigments. Always test the color on the bottom of your pumpkin before using. Here are some that I tried:
Glitter Markers – some worked, some didn’t. For example, a purple color worked wonderfully, but a blue one did not.
Metallic Gel Pens – didn’t work very well.
Metallic markers – worked awesomely! In fact, I think using a metallic marker would be the easiest way to create the dots. I ordered a set, but they didn’t arrive in time for this blog. I ended up playing with them after I wrote this and created the video. If you’re interested in looking at it, here’s an affiliate link to amazon: https://amzn.to/3fCNHKZ
Acrylic Paints. The benefit of acrylic paints are that they can be used straight out the bottle. Better yet, there are sets of metallic colors available. Yes, I have a thing for sparkly, shiny, glittery, metallic things. Yes, I ordered a set metallic paints, but like the markers, they did not arrive in time for this blog. Here’s a link to a set of metallic paints I found on Amazon: https://amzn.to/3tmFG05
STEP 1 – PREP THE PUMPKINS
 Thoroughly wash your pumpkins.
Then rinse them in hot water. I washed and rinsed mine twice.
Afterwards set them out to dry.
Is this step necessary? I do not know. I wanted to remove any surface pesticides and / or waxes that the pumpkin might have.
Note – there are not any more images on this blog. At some point I will restore the photos.
PUMPKIN 1
Let’s decorate the first pumpkin.
Only one pen tip is needed for this pumpkin. I’m using a solid brass large rounded end writer pen tip. If you don’t have this style, then try using a large ball pen tip. Near the end of this blog I’ll demonstrate some alternate pen tips.
Burn a line of dots along the upper portion of the pumpkin. I let the line rise and fall along the pumpkin ribs. On the apex of the rib the line is at its highest point. In the valley between two ribs the line drops to its lowest point.
Use the bottom of the pumpkin to test the burn results of the pen tip.
With all of the solid brass pen tips, I ended up having the heat set to the highest possible setting.
The ring of dots is from testing out heat settings for the large ball wire tip.
I ended up using a pretty high setting for this too.
I avoided burning on the blemishes my pumpkin had. It had a lot. Not sure why I didn’t notice this when I put it in my grocery basket.
After I got the line burned in, I decided I wanted the apex dots larger. I reburned over all of them by holding the pen tip in place until a really large dot was produced.
Then I burned two dots below the apex dot. These two dots formed the dangling chain or line that would “hold” the teardrop design.
Next, I drew in a teardrop design just below the second vertical dot. I tried to keep the spacing the same between the dots and the teardrop.
I switched to a shaded and tried burning the drop so that it would look 3d. That didn’t work well!
I gave up and burned it to a fairly uniform color.
Given that this pumpkin is going to rot and have to be thrown into the garbage, it’s probably a good thing not to spend a lot of time burning.
Here’s how the teardrop looked after I was done. Not very remarkable.
On the second teardrop, I used the brass tip and that worked much better.
I used circular motion as my burn stroke to fill in the teardrop.
I worked my way around the pumpkin, burning a teardrop onto every rib on the pumpkin.
Also, I did re-burned over the first teardrop to darken to a color that matched the rest of the teardrops.
Afterwards, I flipped the pumpkin over and burned a row of dots along the lower portion of the pumpkin.
This line didn’t curve as much as the upper line.
Here’s how the pumpkin looked up to this point.
At the last minute I decided to add some large dots below the lower line in the valley of the pumpkins. The pen tip was too large to fit in some valleys, so I ended up with double dots. Not sure if this was a good addition or not. As always, if you don’t like it, then omit this step. I’m burning, so now it’s time to add some color.
First Color – Super Russet #654. This is a nice coppery red color that I think is a great fall color.
I’m using an embossing tool that has a medium size ball tip on it to apply small dots of paint just above the upper burn line.
I also applied a line of dots just below the lower burn line.
And I applied a large dot of paint below the large burned dots.
Second color – Turquoise #686. This is a beautiful metallic blue color that goes well with copper.
The turquoise was applied just below the upper burn line.
And just above the lower burn line.
For some reason, I made the dot in the valley larger than the rest of the dots. It looks decent.
Here’s how the pumpkin looked once I was done and the paint dried. It doesn’t have much of a metallic sheen. Lesson learned, don’t use white glue as the binder for PearlEx pigments.
PUMPKIN 2
This pumpkin reminds me of winter, or a design you’d see on a wool sweater. 😊
For this pumpkin I used a large ball pen tip.
I also used a solid brass pen tip with an image of a flower, or in this case snowflake on it.
This diamond or square shaped pen tip is another solid brass tip I used.
The burning starts out just like the last pumpkin. Burn a line of dots that rises on the pumpkin ribs, and falls in the pumpkin valleys. The only difference with this pumpkin is that I’m using a large ball pen tip.
Then burn two dots below the apex dot, and switch to the snowflake pen tip. Stamp (burn) the snowflake design just below the two dots.
Since the pumpkin ribs are curved, you need to rock or angle the pen tip around to make sure all sides of it come in contact with the pumpkin. I discovered this after my first burn attempted didn’t go so well.
It is possible to carefully align the stamp with the image and re-burn over it. I will cover that in the fixing mistakes section.
My second attempt I made sure to rock or angle the pen tip around. Another way of visualizing this is that I lean the pen tip towards the four different points on a compass. I begin by pressing the tip to the pumpkin, then I gently lean it upward, downward, to the left, and to the right.
It’s just easier to say rocking or angling the pen tip, but hopefully you have a clear understanding of what I mean.
Rocking the pen tip around results in a much better burn result.
To keep the line a more uniform distance from the stem, I burn the apex dot on each rib. This really did help.
Use a light hand pressure when burning. You can burn through the skin and the underlying flesh doesn’t darken up.
Then I burned in the rest of the dots between the large apex dots.
Also burn in the two dots below the apex dot.
Afterwards, add the snowflake image below them the dots as you work your way around the pumpkin.
Flip the pumpkin over and repeat the process. Start by burning the apex dots first on the peak of every pumpkin rib.
Then burn in the rest of the dots.
Including the two vertical dots.
Afterwards, add the snowflake design.
I switched to the diamond shaped tip, and burned a row of diamonds in the middle of the pumpkin.
I had a number of images that didn’t burn complete. This was really common in the pumpkin valleys, but don’t fret about it because it can be fixed rather easily.
After all of the diamonds are burned in, then switched to the ball tip and fill in the missing areas on the diamonds.
You can use a shader or other larger pen tip if you prefer. This was already equipped on the handset, so I used it.
First Color – Interference Blue #671. This color is one that will look either white or blue depending on how the light strikes it. I thought it would make a great accent on the snowflakes.
I used an embossing tool with a slightly smaller ball tip than what I used on the first pumpkin. Apply a tiny dot of paint at the end of each spoke on the snowflake.
Also apply a dot of paint to the center of each snowflake.
I also applied a tiny dot of paint along the top and bottom of each diamond.
Second Color – Reflex Violet $654. This is a gorgeous purple color.
I’m using a large ball tipped embossing tool to apply a large dot of paint in the center of each diamond.
Then I switched to smaller tip and applied a line of dots just above the upper burn line.
For some reason I applied paint to the lowest dot in the valley. Looking back, I would omit this dot.
Afterwards, I painted a dot below the burn mark. This one was fine to me.
Here’s how it looks so far.
Next, apply a line of dots below the lower burn line.
For symmetry, I included the dot above the valley dot.
PUMPKIN 3
This pumpkin is the most ornate of the 3. The one thing I dislike are the painted dots on the burn marks. In retrospect, I wouldn’t paint over any of the burn marks on this pumpkin.
First is the crescent moon solid brass pen tip.
I also used the diamond shaped pen tip.
The large rounded end writer brass pen tip was used.
Lastly, I used the small rounded end writer brass pen tip.
Burn a crescent moon in the middle of one of the pumpkin ribs.
Then flip the pumpkin over and burn another crescent moon adjacent to the first one.
To save time, burn all of the crescent moons in one direction on every pumpkin rib.
Then flip the pumpkin over and add the second crescent moon.
Once the moons are in place, add a diamond above and below the moons. I tried to make sure that one of the diamond points was pointed down where the crescent moons touch.
Do your best to keep the image in a straight vertical line. I didn’t do extremely well on this point.
Next, add a really large dot above the point on the upper diamond, and below the lower point on the bottom diamond.
Also add a large dot near the crescent moons. I tried to align the dot to be in the center between the moon points.
It was at this point there was a video camera malfunction; some idiot forgot to turn the camera on. So I re-created the design on a piece of wood to show you the last of the burning.
Use a small brass writer tip and add a tiny dot above the upper large dot, and below the lower large dot.
Next, add a tiny dot next to the left and right points on both diamonds.
Then add a cone shape to the large dot by the crescent moon.
Burn the cone to a dark brown or black color.
Lastly, add a large dot adjacent to the cone. This large dot ends up being down in the pumpkin valley.
Here’s how the completed design looks on the piece of wood.
Here’s how the completed design looks on the pumpkin.
I started out putting a dot of interference violet on the cone and dot between them. I really disliked this color. It was semi-translucent and hard to see.
I didn’t include this color on the list because it didn’t go well with the pink and silver theme. In all honesty, I wouldn’t paint over any of the burn marks on this pumpkin.
Next, add a line of salmon pink dots above the burned design. I kept the line pretty close to the burned image, so there is a lot of height difference between the apex dot and the valley.
Add a line below the burned design. This line I kept flatter. If you prefer the more curved look of the upper line, then modify the line accordingly.
Then add a large dot of paint on the apex of each rib. Place the dot about 1/4 inch (0.64 cm) above the upper line.
I will mention that this would be easier using a large balled embossing tool. Instead I used the same one to make the smaller dots, so had to apply the paint several times to make the dot as large as I wanted.
Afterwards, add lines of dots that angle down to the valley.
This line should connect with the lower line in the valley.
Next add a line of silver dots between the two rows of pink.
I added a tiny dot adjacent to the tiny burned dots by the left and right points of the diamond.
I also painted over the dots on the cone with silver. Again, I personally didn’t care for how this looked, and, if I could do it over, I’d omit this step.
Add the row of silver dots between the two rows of pink along the bottom of the pumpkin.
Let the paint dry and the pumpkin is ready.
ALTERATIVES
This board shows the brass tip image on the left, and my suggested alternative on the right. So let’s go over the board.
In place of the large rounded end writer, I’d use a large ball pen tip.
Another option would be a spoon shader. Look through your pen tips, you might have something else that would work.
This shows a side view of the spoon shader I have.
To replicate the snowflake, use a large ball tip or standard writer and burn a large x.
Then add additional spokes. I started this burn by creating a large dot first. In retrospect, I’d burn the spokes and then add the dot.
Also, my final snowflake looked more like a spider, but I’m sure you can do much better than I did. I’d recommend doing a couple of practice snowflakes on scrap wood.
In place of the diamond shaped pen tip, I would use a standard writer pen tip and draw a diamond shape.
Then burn the diamond to a dark color. I used the writer pen tip for this, but you can also use a shader or ball tip.
I would also use a standard writer pen tip to draw the crescent moon shape.
This design is so small, that the writer was able to burn it to a dark color fairly quickly.
For the small brass writer, you can use a standard writer pen tip.
You can also use a medium ball tip. The benefit of the ball tip is that it is easier to get consistently shaped dots. Well, at least it is for me.
This image compares the large and medium ball tips to each other.
THINGS TO KNOW
The glue, and probably paint, can occasionally create thin tails or strings that connect the dot to the embossing tool. Make sure to lift the embossing tool straight up until the string breaks before starting a new dot. Acrylic paint might do this also, so be on the look out for it.
If you don’t, you can end up with thin paint lines connecting the dots. Is this the end of the world? No, but it can be avoided.
Use a light handpress when burning to keep from breaking through the skin. The underlying flesh doesn’t darken up. The ball tip was the one I had the problem with. Probably because I was rotating it around to create the apex dots. What I should have done is moved the pen tip in a circular fashion.
Be careful! The skin on the pumpkin can be slick and the pen tip can slide. This was a common occurrence in areas where the pumpkin really curved.
When using the brass tips, it is often necessary to rock or angle the pen tip around to get a good burn result. It was during the time I was rocking the pen tip that I experienced sliding when using the brass tips.
The tips are large and hot, so it was pretty common for the pumpkin to ooze fluid. This fluid can make the pen tip slide and sometimes it can interfere with getting a good burn result.
FYI – Don’t be surprised to hear popping and/or slight hissing sounds when you burn. That is the oozed fluid of the pumpkin coming into contact with the hot pen tip. It startled me the first time it happened!
FIXING PROBLEMS
If you have an image that doesn’t stamp completely, it can be fixed.
Carefully align the pen tip over the burn mark. Then angle or rock the pen tip in the direction that didn’t burn.
Problem fixed. Before I tried fixing a problem burn, I did several other burns to practice the movement needed to get a good impression.
This burn mark didn’t go well because the pumpkin oozed some fluid.
I realigned the pen tip over the burn mark and tried again. I held the tip in place longer than normal to evaporate the fluid.
I ended up with a good impression.
This is an example where the pen tip slid and darkened a spot that I didn’t want darkened.
I’m gently scraping the burn with the edge of a sharp knife.
That makes it a lot less noticeable.
Be aware that it is very easy to scrape the skin off the pumpkin. The underlying flesh doesn’t darken up. Fortunately for me, this didn’t overlap onto the area where the diamond design would go.
I used too heavy of a hand pressure when creating this apex burn mark, and I broke through the skin.
I’m dabbing a little dot of black acrylic paint over the crack.
That will hide the problem. Since the paint has a matte finish, it won’t be noticeable after it dries.
As you can see, I smeared some paint. I wasn’t paying close enough attention to where I was placing my fingers!
I used a slightly damp paint brush to remove the smear paint.
This took a couple of swipes of the paint brush to remove it. I do want to point out that the paint brush needs to be cleaned the paint brush after each swipe, otherwise the paint will just smear around.
To remove the last of the residual glue-paint mixture, I wiped over the area with a Q-tip. This had the added benefit of helping dry the pumpkin.
Make sure the pumpkin is completely dry before re-painting it.
IN CONCLUSION
That’s it for the project. I hope you found this to be a fun and easy project to follow along with. It would be very easy to customize the colors to whatever color theme you want, so the decorations will match the décor.
While I didn’t plan anything in advance, I thought my pumpkins turned out fairly well.
Until the next blog,
Brenda
Nov 15, 2022
Want to subscribe?
- Click on the “Leave a Comment” field at the end of any post (blog) and a subscribe option will appear.
- Put something in the comment field (if you put “test” or “just subscribing” I won’t make your comment public)
- Fill in the sections for your email address and name, and then click on the “notify me of new posts via email.”
- You will get a confirmation email from WordPress confirming you want to subscribe.
- Click on the confirm button in that email and you’re done.
Please note that I do not send out emails. If you have a WordPress account there is a way to subscribe within the WordPress system, but I cannot provide specifics on how it works as I don’t know.
Great ideas and amazing wirk Brenda, I’ll try it for sure. I liked the colors and using the burning tips to decorate the pumpkins and it turned out great, thanks you for sharing☺️👍🧡
Hello Ghada,
thank you so much for the lovely comment. Glad you liked it!